Webhooks
Webhook ချိတ်ဆက်မှုများဖြင့် Zealy ၏ စွမ်းရည်များကို မြှင့်တင်ပါ။
ရေးသားသူ louis, Fredrika, benjamin
ဤစာမျက်နှာတွင်
Zealy webhook သည် အသင်းအဖွဲ့ ဖြစ်ရပ် ကိုးခုအနက် တစ်ခု ဖြစ်ပေါ်သောအခါ သင်ရွေးချယ်ထားသော URL သို့ HTTP POST ကို ပို့ပေးပါသည်။ ယင်းတို့တွင် အဖွဲ့ဝင်တစ်ဦး ပါဝင်ခြင်း၊ quest claim အောင်မြင်ခြင်း သို့မဟုတ် မအောင်မြင်ခြင်း၊ sprint စတင်ခြင်းနှင့် အသုံးပြုသူတစ်ဦးကို ပိတ်ပင်ခြင်းတို့ ပါဝင်သည်။ payload တစ်ခုစီတွင် event id၊ type၊ data၊ မီလီစက္ကန့် timestamp နှင့် တောင်းဆိုမှုသည် စစ်မှန်ကြောင်း သက်သေပြသည့် secret တို့ ပါဝင်သည်။
အခြေခံအချက်များ
Zealy သည် ပေးအပ်သည် webhooks ကို ပေးအပ်ပြီး ဒေတာ ဖန်တီးခြင်း သို့မဟုတ် အပ်ဒိတ်လုပ်ခြင်း ဖြစ်တိုင်း HTTP push အသိပေးချက်များကို လက်ခံရယူနိုင်စေသည်။ ၎င်းက Zealy ပေါ်တွင် ပေါင်းစပ်မှုများ တည်ဆောက်နိုင်စေသည်။ CI build များကို အစပျိုးခြင်း၊ quest ဒေတာအပေါ် တွက်ချက်မှုများ ပြုလုပ်ခြင်း သို့မဟုတ် သတ်မှတ်အခြေအနေများတွင် မက်ဆေ့ချ်များ ပို့ခြင်းတို့ကို ပြုလုပ်နိုင်သည် – သင်ဆိုလိုသည်မှာ မည်သည့်အရာမဆို ဖြစ်နိုင်သည်။
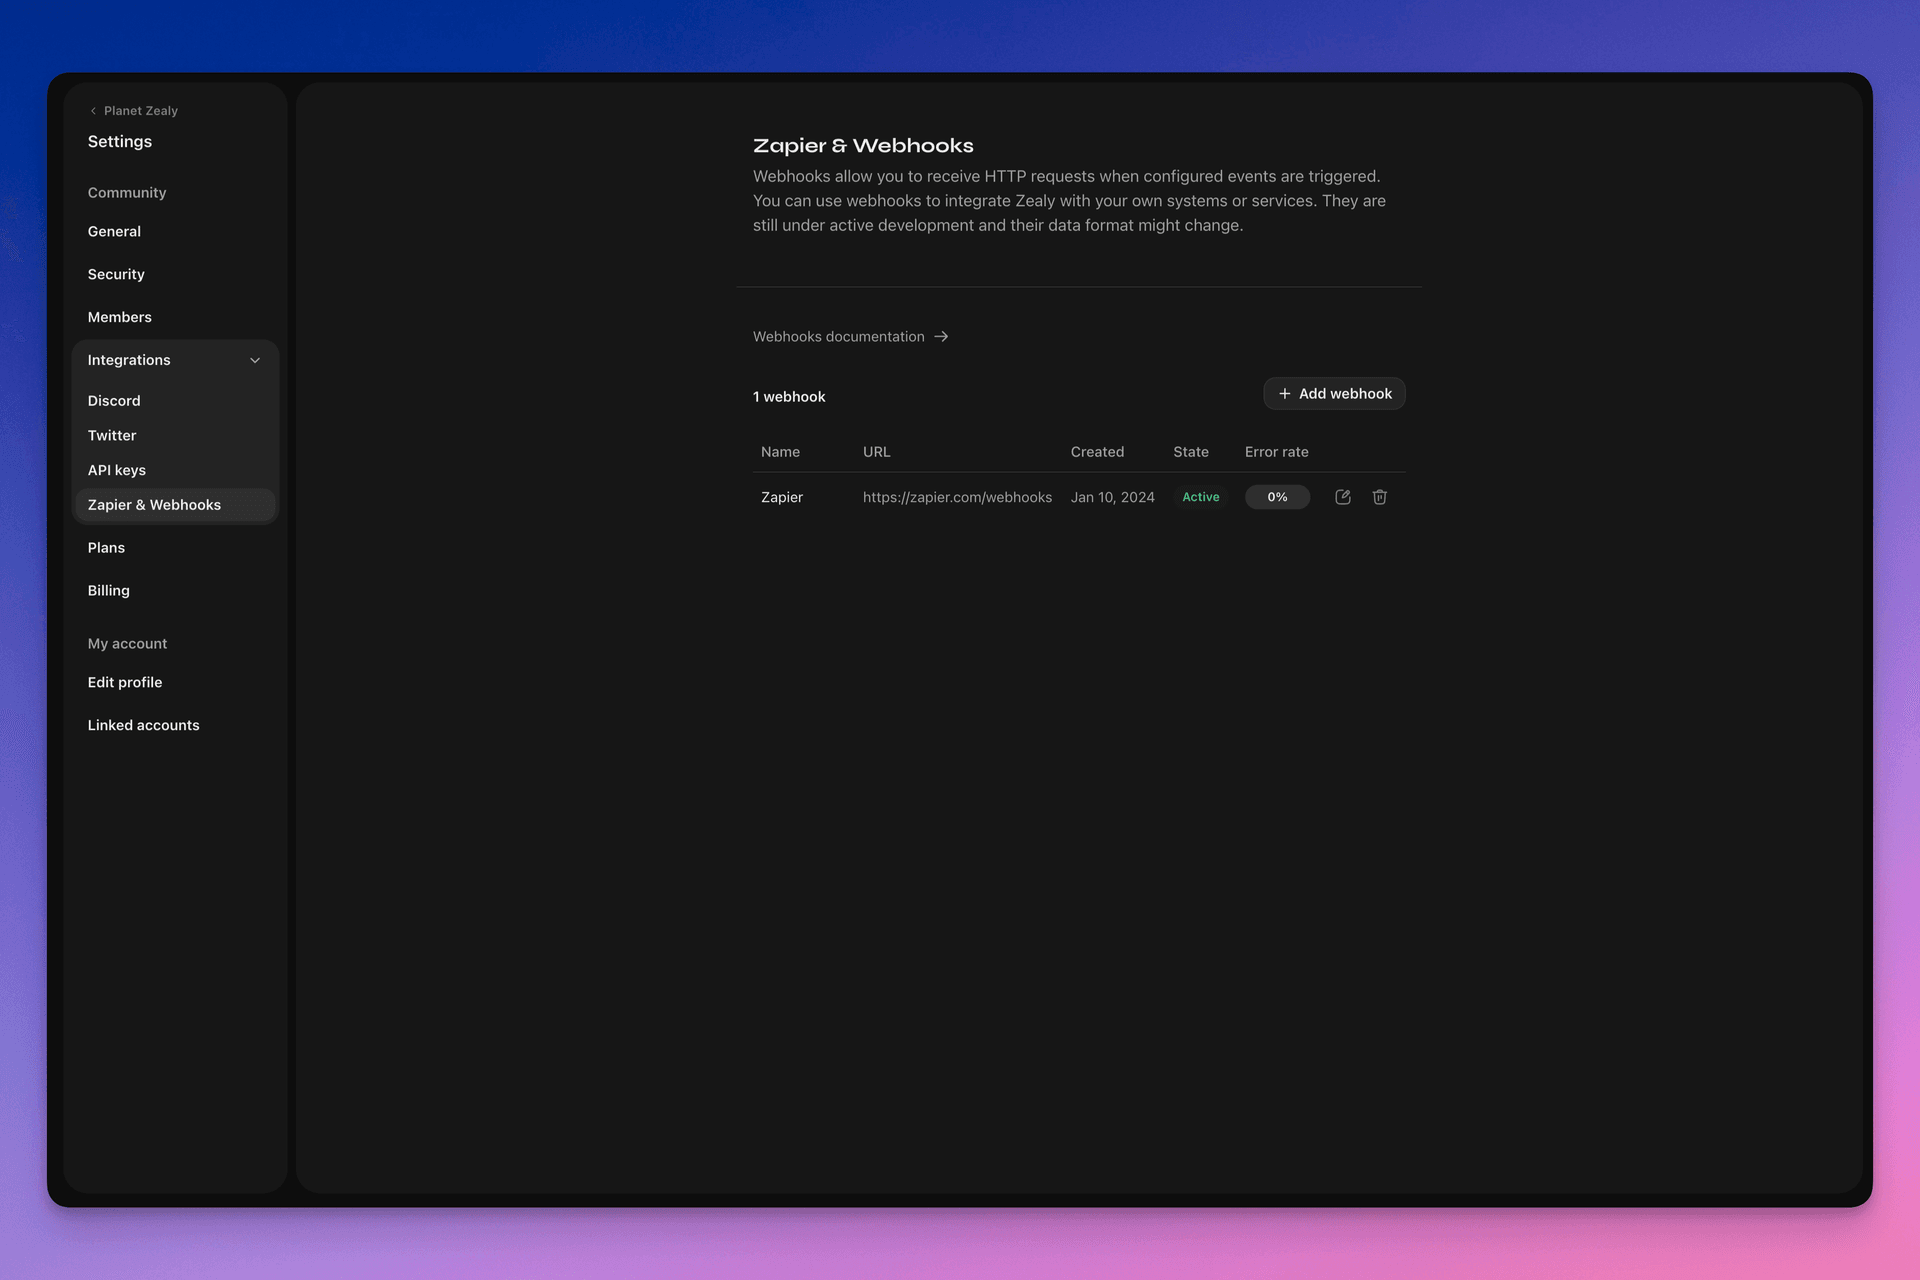
သင့် webhooks များ သတ်မှတ်ရန် Settings > Integrations > Zapier & Webhooks သို့ သွားရောက်ပါ။
Webhook က ဘယ်လိုအလုပ်လုပ်သလဲ။
Webhook push ဆိုသည်မှာ ရိုးရှင်းစွာ HTTP POST သင်ရွေးချယ်ထားသော URL သို့ ပို့သည့် request ဖြစ်သည်။ ဒေတာ အပ်ဒိတ်ဖြစ်သောအခါ Linear မှ push ကို အလိုအလျောက် စတင်လုပ်ဆောင်သည်။ payload တွင် မည်သည့်ဒေတာပါဝင်သည်ကို ဥပမာကြည့်ရန် ဤနေရာတွင် ကြည့်ပါ Webhook Payload.
သင့် webhook consumer သည် ရိုးရှင်းသော HTTP endpoint ဖြစ်သည်။ ၎င်းသည် အောက်ပါအခြေအနေများကို ဖြည့်ဆည်းရမည်။
- ၎င်းသည် အများသူငှာ ဝင်ရောက်နိုင်သော HTTPS၊ localhost မဟုတ်သည့် URL တွင် ရရှိနိုင်ရမည်
- ၎င်းသည် Zealy Webhook push (HTTP POST request) ကို
HTTP 200("OK") response ဖြင့် တုံ့ပြန်မည်
ပို့ဆောင်မှုတစ်ခု မအောင်မြင်ပါက (ဥပမာ ဆာဗာမရနိုင်ခြင်း၊ တုံ့ပြန်မှုသည် 5 စက္ကန့်ထက် ကြာခြင်း၊ တုံ့ပြန်မှု body သည် 5000 bytes ထက် ကြီးခြင်း သို့မဟုတ် HTTP status code 200 မဟုတ်သော တုံ့ပြန်မှု ပြန်လာခြင်း)၊ push ကို 15 ကြိမ် ထပ်မံကြိုးစားပါမည်။ ဤနေရာတွင် exponential backoff ကြန့်ကြာမှုကို အသုံးပြုသည်- ကြိုးစားမှုကို ခန့်မှန်းခြေ 10 မိနစ်၊ ထို့နောက် 30 မိနစ် စသည်ဖြင့် ထပ်မံကြိုးစားပါမည်။ webhook URL သည် ဆက်လက် တုံ့ပြန်မှုမရှိပါက webhook ကို Zealy မှ ပိတ်ထားနိုင်ပြီး ကိုယ်တိုင် ပြန်လည်ဖွင့်ရပါမည်။
Webhook တစ်ခုကို Zealy မှ အမှန်တကယ် ဖန်တီးထားကြောင်း သေချာစေရန် ကျွန်ုပ်တို့သည် ကျပန်း secret တစ်ခုကို ဖန်တီးပြီး ၎င်းကို တောင်းဆိုမှု၏ body တွင် ပူးတွဲထည့်သွင်းပါသည်၊ POST ကို Zealy မှ အမှန်တကယ် ဖန်တီးထားကြောင်း သေချာစေရန် ကျွန်ုပ်တို့သည် ကျပန်း secret တစ်ခုကို ဖန်တီးပြီး ၎င်းကို တောင်းဆိုမှု၏ body တွင် ပူးတွဲထည့်သွင်းပါသည်၊ secret field တွင်။
Webhooks အကြောင်း ထပ်ဆောင်း အချက်အလက်များအတွက် ကောင်းမွန်သော အရင်းအမြစ်များစွာ ရှိပါသည်-
- RequestBin: Webhooks – The Definitive Guide
- requestbin.com သည် webhooks စမ်းသပ်ရန် ကောင်းမွန်သော ကိရိယာတစ်ခု ဖြစ်သည်
- GitHub ဆော့ဖ်ဝဲရေးသားသူ လမ်းညွှန်- Webhooks
ဘယ်အတွက် အသုံးပြုနိုင်သလဲ။
- Zapier နှင့် ချိတ်ဆက်ပါ
- စိတ်ကြိုက်ဆုလာဘ်များကို အလိုအလျောက် လုပ်ဆောင်ပါ
- ပြန်လည်သုံးသပ်ရန် စောင့်ဆိုင်းနေသော quest များကို Telegram တွင် အသိပေးပါ
နှင့် အခြားများစွာ။
Zealy Webhooks ကို စတင်အသုံးပြုခြင်း
- သင်စောင့်ကြည့်လိုသော event များကို ဖော်ထုတ်ပါ။
- ဖြစ်ရပ်ဒေတာ POST တောင်းဆိုချက်များကို လက်ခံရန် webhook endpoint လုပ်ဆောင်ချက်တစ်ခု တည်ဆောက်ပါ။
- Settings > Integrations > Zapier & Webhooks ရှိ Webhooks Dashboard ကို အသုံးပြု၍ Zealy အတွင်း သင့် endpoint ကို မှတ်ပုံတင်ပါ။
- သင့် webhook endpoint ကို လုံခြုံအောင် ပြုလုပ်ပါ။
ရိုးရှင်းသော Webhook consumer တစ်ခု ဖန်တီးခြင်း
ရိုးရှင်းသော HTTP(S) endpoint များ ဖြန့်ကျက်ရန် လွယ်ကူသော နည်းလမ်းကို ပေးသော Netlify Functions ကဲ့သို့သော အရာကို အသုံးပြုရန် စဉ်းစားနိုင်ပါသည်။ https://www.netlify.com/blog/2018/09/13/how-to-run-express.js-apps-with-netlify-functions/.
// server.js
//
// Use this sample code to handle webhook events in your integration.
//
// 1) Paste this code into a new file (server.js)
//
// 2) Install dependencies
//   npm install express
//
// 3) Run the server on http://localhost:4242
//   node server.js

// The library needs to be configured with your account's secret key.
// Ensure the key is kept out of any version control system you might be using.
const express = require('express');
const app = express();

// This is your Zealy webhook secret for testing your endpoint locally.
const endpointSecret = '5888a6800dbac634e52d8504f097e064';

app.post('/webhook', express.raw({ type: 'application/json' }), (request, response) => {
  const payload = req.body;
  // Does createdAt make more sense than time?
  const { id, type, data, time, secret } = payload;

  if (secret === endpointSecret) {
    // Do something neat with the data received!
  }

  // Return a 200 response to acknowledge receipt of the event
  response.send();
});

app.listen(4242, () => console.log('Running on port 4242'));
ဆက်တင်များတွင် ပြင်ဆင်သတ်မှတ်ခြင်း
Settings > Integrations > Webhooks တွင် webhook နှင့် ၎င်းစောင့်ကြည့်ရမည့် ဖြစ်ရပ်များကို သတ်မှတ်ပါ။
Webhook payload
Webhook HTTP payload တွင် HTTP headers နှင့် request body နှစ်ခုစလုံးတွင် အချက်အလက်များ ပါဝင်မည်ဖြစ်သည်။
Payload ကို အောက်ပါ HTTP headers များဖြင့် ပေးပို့မည်:
User-Agent: Zealy-Webhook
Content-Type: application/json; charset=utf-8
{
  id: string // unique ID for this event (UUID v4)
  type: "JOINED_COMMUNITY" | "LEFT_COMMUNITY" | "QUEST_SUCCEEDED" | "QUEST_CLAIMED" | "QUEST_FAILED" | "QUEST_CLAIM_STATUS_UPDATED" | "SPRINT_STARTED" | "SPRINT_ENDED" | "USER_BANNED", // event type
  data: EventData, // event data, see below
  time: number, // timestamp, in milliseconds
  secret: string, // secret generated when you created your webhook, used for checking origin
}
Event တစ်ခုစီအတွက် EventData field:
// JOINED_COMMUNITY
type JoinedCommunityEventData = {
  community: WebhookCommunityPayload;
  user: WebhookUserPayload;
};

// LEFT_COMMUNITY
type LeftCommunityEventData = {
  community: WebhookCommunityPayload;
  user: WebhookUserPayload;
};

// QUEST_SUCCEEDED
type QuestSucceededEventData = {
  community: WebhookCommunityPayload;
  user: WebhookUserPayload;
  quest: WebhookQuestPayload;
  taskInputs?: Array<{
    taskId: string, // task ID (uuid v4)
    taskType: 'number' | 'date' | 'api' | 'text' | 'discord' | 'url' | 'telegram' | 'quiz' | 'invites' | 'visitLink' | 'file' | 'poll' | 'opinion' | 'twitterFollow' | 'twitterSpace' | 'tweetReact' | 'tweet',
    input: WebhookQuestTaskInputPayload,
  }>;
  status: 'success';
};

// QUEST_CLAIMED
type QuestClaimedEventData = {
  community: WebhookCommunityPayload;
  user: WebhookUserPayload;
  quest: WebhookQuestPayload;
  taskInputs?: Array<{
    taskId: string, // task ID (uuid v4)
    taskType: 'number' | 'date' | 'api' | 'text' | 'discord' | 'url' | 'telegram' | 'quiz' | 'invites' | 'visitLink' | 'file' | 'poll' | 'opinion' | 'twitterFollow' | 'twitterSpace' | 'tweetReact' | 'tweet',
    input: WebhookQuestTaskInputPayload,
  }>;
};

// QUEST_FAILED
type QuestFailedEventData = {
  community: WebhookCommunityPayload;
  user: WebhookUserPayload;
  quest: WebhookQuestPayload;
  taskInputs?: Array<{
    taskId: string, // task ID (uuid v4)
    taskType: 'number' | 'date' | 'api' | 'text' | 'discord' | 'url' | 'telegram' | 'quiz' | 'invites' | 'visitLink' | 'file' | 'poll' | 'opinion' | 'twitterFollow' | 'twitterSpace' | 'tweetReact' | 'tweet',
    input: WebhookQuestTaskInputPayload,
  }>;
};

// QUEST_CLAIM_STATUS_UPDATED
type QuestClaimStatusUpdatedEventData = {
  community: WebhookCommunityPayload;
  user: WebhookUserPayload;
  quest: WebhookQuestPayload;
  taskInputs?: Array<{
    taskId: string, // task ID (uuid v4)
    taskType: 'number' | 'date' | 'api' | 'text' | 'discord' | 'url' | 'telegram' | 'quiz' | 'invites' | 'visitLink' | 'file' | 'poll' | 'opinion' | 'twitterFollow' | 'twitterSpace' | 'tweetReact' | 'tweet',
    input: WebhookQuestTaskInputPayload,
  }>;
  status: 'success' | 'pending' | 'failed';
};

// SPRINT_STARTED
type SprintStartedEventData = {
  community: WebhookCommunityPayload;
  sprint: WebhookSprintPayload;
};

// SPRINT_ENDED
type SprintEndedEventData = {
  community: WebhookCommunityPayload;
  sprint: WebhookSprintPayload;
};

// USER_BANNED
type UserBannedEventData = {
  community: WebhookCommunityPayload;
  user: WebhookUserPayload;
};
Common entities:
type WebhookCommunityPayload = {
  id: string; // community ID (uuid V4)
  name: string; // community name
  subdomain: string; // community subdomain
  blockchain: string;
  discord: string | null; // discord URI of the community, e.g., https://discord.gg/zealy
  twitter: string | null; // twitter handle of the community, e.g., zealy_io
  website: string | null; // website URI of the community
};
type WebhookUserPayload = {
id: string; // user ID (uuid V4)
name: string | null; // user display name
twitter: {
id: string; // user twitter ID
username: string | null; // user twitter handle
} | null;
discord: {
id: string; // user discord ID
handle: string | null; // user discord handle
} | null;
email: string | null; // user email
addresses: Dict<string>; // key/value dictionary for wallets
verifiedAddresses: Dict<string>; // key/value dictionary for all users verified wallets
};type WebhookQuestPayload = {
id: string; // quest ID (uuid V4)
name: string; // quest display name
categoryId: string; // category ID (uuid V4)
categoryName: string | null; // category display name
xp: number | null; // XP reward
published: boolean | null; // true if quest is published, false otherwise
autoValidate: boolean | null;
tasks: TaskPayload[];
lastReviewerId: string; // user ID (uuid V4)
};type WebhookQuestTaskInputPayload =
| { } // for task type 'visitLink', 'invites', 'discord', 'telegram', 'twitterFollow', 'twitterSpace'
| { value: string } // for task type 'text', 'date', 'url', 'opinion'
| { value: number } // for task type 'number'
| { values: string[] } // for task type 'poll', 'quiz'
| { fileUrls: string[] } // for task type 'fileUrls'
| { tweetId?: string } // for task type 'tweetReact', 'tweet'
| { requestId: string, statusCode: number } // for task type 'api'type WebhookSprintPayload = {
id: string; // sprint ID (uuid V4)
startingAt: ISOString; // sprint starting date - https://developer.mozilla.org/en-US/docs/Web/JavaScript/Reference/Global_Objects/Date/toISOString
endingAt: ISOString; // sprint ending date
};Webhooks များကို လုံခြုံအောင်ပြုလုပ်ခြင်း
Webhook တစ်ခု ဖန်တီးခြင်းဖြင့် request သည် Zealy webhooks မှ လာကြောင်း အတည်ပြုရန် အသုံးပြုနိုင်သော ကျပန်း secret တစ်ခု ဖန်တီးပေးမည်။ Webhook inspect panel ၏ ညာဘက်အပေါ်ထောင့်ရှိ secret ကို ကူးယူပြီး POST request ၏ body တွင် သတ်မှတ်ထားသော secret နှင့် တူညီကြောင်း အတည်ပြုပါ။
Secret ပေါက်ကြားသွားပါက ထိုစာမျက်နှာတွင်ပင် ပြန်လည်ထုတ်လုပ်နိုင်သည်။

Webhooks စမ်းသပ်ခြင်း
Webhook ၏ စစ်ဆေးရန် အကန့်မှ စမ်းသပ်ဖြစ်ရပ်တစ်ခုကို ကိုယ်တိုင်စတင်နိုင်ပါသည်။ ညာဘက်အပေါ်ထောင့်ရှိ ခလုတ်ကို နှိပ်ပြီး ‘Send test event’ ကို ရွေးပါ။ စောင့်ကြည့်နေသော ဖြစ်ရပ်အမျိုးအစားများထဲမှ ဖြစ်ရပ်အမျိုးအစားတစ်ခုကို ရွေးနိုင်ပါမည်။ စမ်းသပ်ဒေတာဖြင့် ဖြစ်ရပ်တစ်ခု စတင်မည်ဖြစ်ပြီး အခြေအနေကို ပြသပါမည်။
အမှားရှာဖွေခြင်း
Webhooks စာမျက်နှာမှ webhook ကို နှိပ်ပါက webhook မှ စတင်ခဲ့သော ယခင်ဖြစ်ရပ်အားလုံး၏ မှတ်တမ်းများကို ကြည့်ရှုနိုင်ပါသည်။ အခြေအနေအလိုက် စစ်ထုတ်ခြင်းဖြင့် တစ်ခုခု မှားယွင်းသွားပါက အမှားရှာဖွေရန် မှတ်တမ်းများကို အသုံးပြုနိုင်ပါသည်။ ဖြစ်ရပ်တစ်ခုစီအတွက် လက်ခံရရှိသော အမှားစာတိုနှင့် ပေးပို့ခဲ့သော တောင်းဆိုချက်ကို ကြည့်ရှုနိုင်ပါသည်။
ဤစာမျက်နှာမှ မည်သည့်ဖြစ်ရပ်ကိုမဆို ထပ်မံကြိုးစားနိုင်ပါသည်။
