Webhooks
Enhance Zealy's Capabilities with Webhook Connections.
Basics
Zealy provides webhooks which allow you to receive HTTP push notifications whenever data is created or updated. This allows you to build integrations on top of Zealy. You could trigger CI builds, perform calculations on quest data, or send messages on specific conditions – you name it.
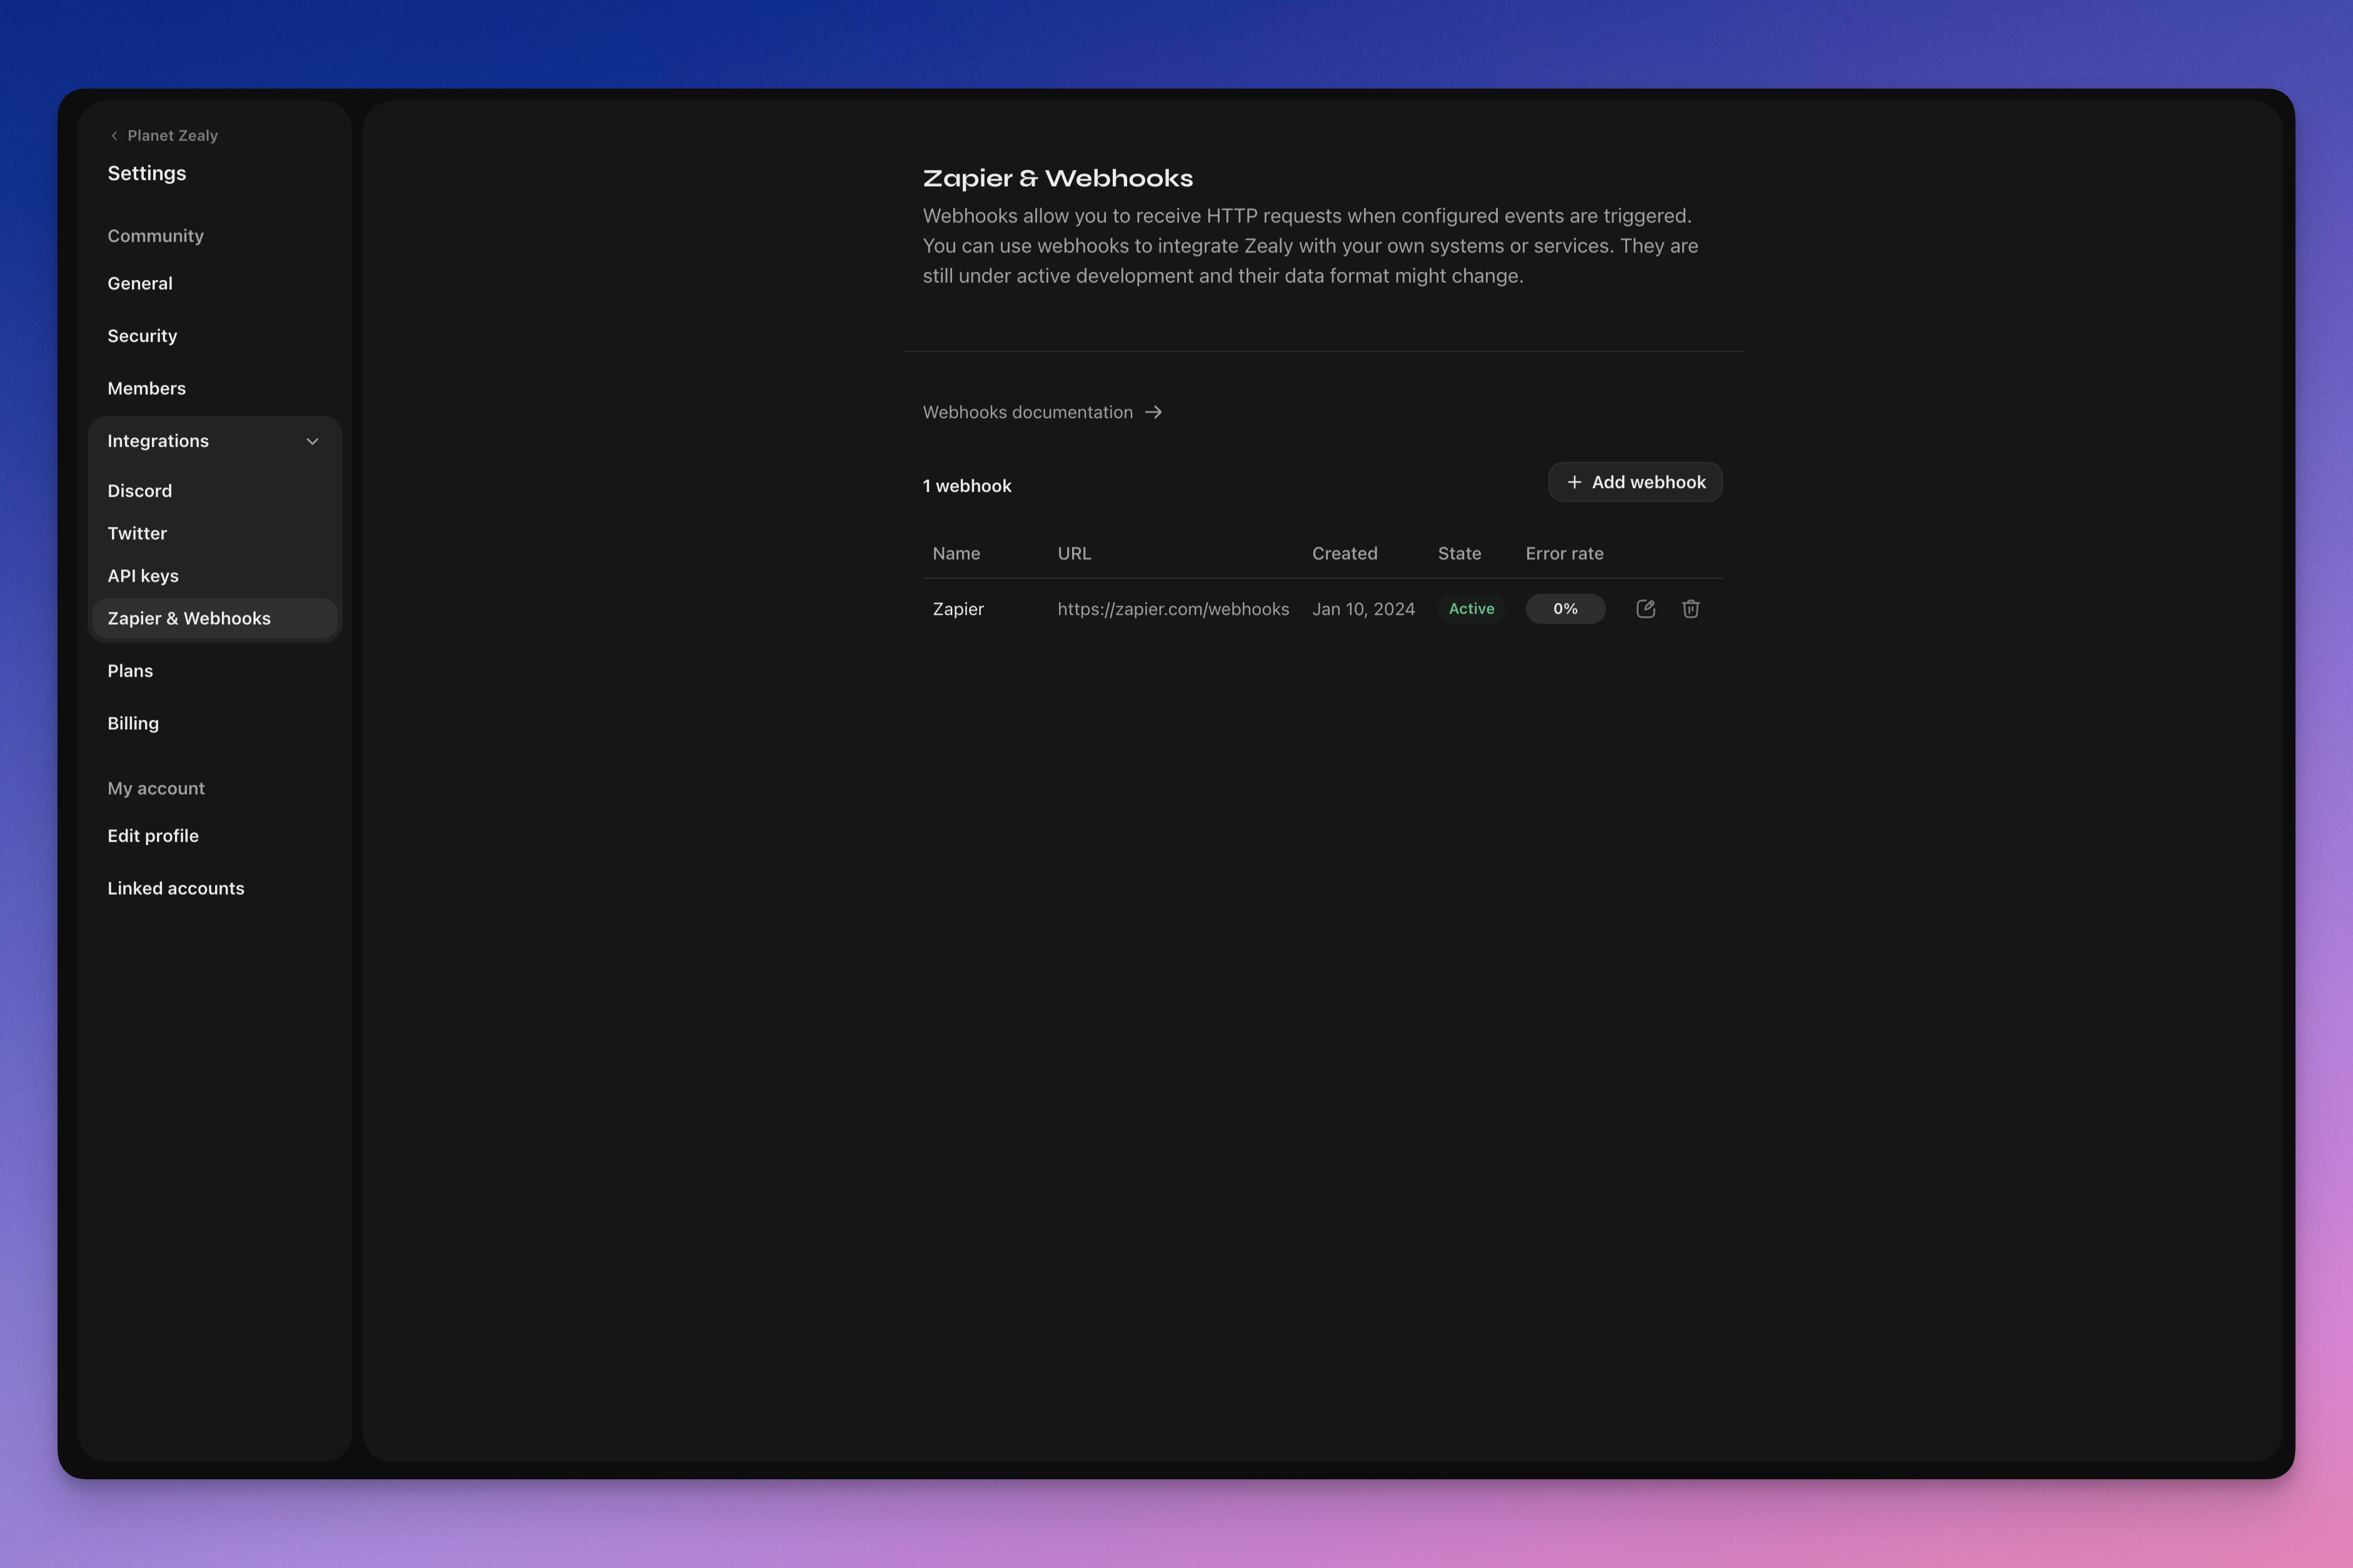
Please visit Settings > Integrations > Zapier & Webhooks to set up your webhooks.
How does a Webhook work?
A Webhook push is simply a HTTP POST request, sent to the URL of your choosing. The push is automatically triggered by Linear when data updates. For an example of what data a payload contains, see The Webhook Payload.
Your webhook consumer is a simple HTTP endpoint. It must satisfy the following conditions:
- It's available in a publicly accessible HTTPS, non-localhost URL
- It will respond to the Zealy Webhook push (HTTP POST request) with an
HTTP 200("OK") response
If a delivery fails (i.e. server unavailable, response took longer than 5 seconds, response body was bigger than 5000 bytes or responded with a non-200 HTTP status code), the push will be retried 15 times. Here an exponential backoff delay is used: the attempt will be retried after approximately 10 minutes, then 30 minutes, and so on. If the webhook URL continues to be unresponsive the webhook might be disabled by Zealy, and must be re-enabled again manually.
To make sure a Webhook POST is truly created by Zealy, we generate a random secret that will be attached to the body of the request in the secret field.
For additional information on Webhooks, there are several good resources:
- RequestBin: Webhooks – The Definitive Guide
- requestbin.com is a great tool for testing webhooks
- GitHub Developer Guide: Webhooks
What can I use it for?
- Integrate with Zapier
- Automate custom rewards
- Notify quests awaiting reviews on Telegram
And much much more!
Getting started with Zealy Webhooks
- Identify which events you want to monitor.
- Develop a webhook endpoint function to receive event data POST requests.
- Register your endpoint within Zealy using the Webhooks Dashboard in Settings > Integrations > Zapier & Webhooks.
- Secure your webhook endpoint.
Creating a simple Webhook consumer
You might consider using something like Netlify Functions, which provides a straightforward way of deploying simple HTTP(S) endpoints: https://www.netlify.com/blog/2018/09/13/how-to-run-express.js-apps-with-netlify-functions/.
// server.js
//
// Use this sample code to handle webhook events in your integration.
//
// 1) Paste this code into a new file (server.js)
//
// 2) Install dependencies
//   npm install express
//
// 3) Run the server on http://localhost:4242
//   node server.js

// The library needs to be configured with your account's secret key.
// Ensure the key is kept out of any version control system you might be using.
const express = require('express');
const app = express();

// This is your Zealy webhook secret for testing your endpoint locally.
const endpointSecret = '5888a6800dbac634e52d8504f097e064';

app.post('/webhook', express.raw({ type: 'application/json' }), (request, response) => {
  const payload = req.body;
  // Does createdAt make more sense than time?
  const { id, type, data, time, secret } = payload;

  if (secret === endpointSecret) {
    // Do something neat with the data received!
  }

  // Return a 200 response to acknowledge receipt of the event
  response.send();
});

app.listen(4242, () => console.log('Running on port 4242'));
Configuring in settings
Set up the webhook and the events it should monitor in Settings > Integrations > Webhooks.
The Webhook payload
The webhook HTTP payload will include information both in its HTTP headers and its request body.
The payload will be sent with the following HTTP headers:
User-Agent: Zealy-Webhook
Content-Type: application/json; charset=utf-8
{
  id: string // unique ID for this event (UUID v4)
  type: "JOINED_COMMUNITY" | "LEFT_COMMUNITY" | "QUEST_SUCCEEDED" | "QUEST_CLAIMED" | "QUEST_FAILED" | "QUEST_CLAIM_STATUS_UPDATED" | "SPRINT_STARTED" | "SPRINT_ENDED" | "USER_BANNED", // event type
  data: EventData, // event data, see below
  time: number, // timestamp, in milliseconds
  secret: string, // secret generated when you created your webhook, used for checking origin
}
EventData field per event:
// JOINED_COMMUNITY
type JoinedCommunityEventData = {
  community: WebhookCommunityPayload;
  user: WebhookUserPayload;
};

// LEFT_COMMUNITY
type LeftCommunityEventData = {
  community: WebhookCommunityPayload;
  user: WebhookUserPayload;
};

// QUEST_SUCCEEDED
type QuestSucceededEventData = {
  community: WebhookCommunityPayload;
  user: WebhookUserPayload;
  quest: WebhookQuestPayload;
  taskInputs?: Array<{
    taskId: string, // task ID (uuid v4)
    taskType: 'number' | 'date' | 'api' | 'text' | 'discord' | 'url' | 'telegram' | 'quiz' | 'invites' | 'visitLink' | 'file' | 'poll' | 'opinion' | 'twitterFollow' | 'twitterSpace' | 'tweetReact' | 'tweet',
    input: WebhookQuestTaskInputPayload,
  }>;
  status: 'success';
};

// QUEST_CLAIMED
type QuestClaimedEventData = {
  community: WebhookCommunityPayload;
  user: WebhookUserPayload;
  quest: WebhookQuestPayload;
  taskInputs?: Array<{
    taskId: string, // task ID (uuid v4)
    taskType: 'number' | 'date' | 'api' | 'text' | 'discord' | 'url' | 'telegram' | 'quiz' | 'invites' | 'visitLink' | 'file' | 'poll' | 'opinion' | 'twitterFollow' | 'twitterSpace' | 'tweetReact' | 'tweet',
    input: WebhookQuestTaskInputPayload,
  }>;
};

// QUEST_FAILED
type QuestFailedEventData = {
  community: WebhookCommunityPayload;
  user: WebhookUserPayload;
  quest: WebhookQuestPayload;
  taskInputs?: Array<{
    taskId: string, // task ID (uuid v4)
    taskType: 'number' | 'date' | 'api' | 'text' | 'discord' | 'url' | 'telegram' | 'quiz' | 'invites' | 'visitLink' | 'file' | 'poll' | 'opinion' | 'twitterFollow' | 'twitterSpace' | 'tweetReact' | 'tweet',
    input: WebhookQuestTaskInputPayload,
  }>;
};

// QUEST_CLAIM_STATUS_UPDATED
type QuestClaimStatusUpdatedEventData = {
  community: WebhookCommunityPayload;
  user: WebhookUserPayload;
  quest: WebhookQuestPayload;
  taskInputs?: Array<{
    taskId: string, // task ID (uuid v4)
    taskType: 'number' | 'date' | 'api' | 'text' | 'discord' | 'url' | 'telegram' | 'quiz' | 'invites' | 'visitLink' | 'file' | 'poll' | 'opinion' | 'twitterFollow' | 'twitterSpace' | 'tweetReact' | 'tweet',
    input: WebhookQuestTaskInputPayload,
  }>;
  status: 'success' | 'pending' | 'failed';
};

// SPRINT_STARTED
type SprintStartedEventData = {
  community: WebhookCommunityPayload;
  sprint: WebhookSprintPayload;
};

// SPRINT_ENDED
type SprintEndedEventData = {
  community: WebhookCommunityPayload;
  sprint: WebhookSprintPayload;
};

// USER_BANNED
type UserBannedEventData = {
  community: WebhookCommunityPayload;
  user: WebhookUserPayload;
};
Common entities:
type WebhookCommunityPayload = {
  id: string; // community ID (uuid V4)
  name: string; // community name
  subdomain: string; // community subdomain
  blockchain: string;
  discord: string | null; // discord URI of the community, e.g., https://discord.gg/zealy
  twitter: string | null; // twitter handle of the community, e.g., zealy_io
  website: string | null; // website URI of the community
};
type WebhookUserPayload = {
id: string; // user ID (uuid V4)
name: string | null; // user display name
twitter: {
id: string; // user twitter ID
username: string | null; // user twitter handle
} | null;
discord: {
id: string; // user discord ID
handle: string | null; // user discord handle
} | null;
email: string | null; // user email
addresses: Dict<string>; // key/value dictionary for wallets
verifiedAddresses: Dict<string>; // key/value dictionary for all users verified wallets
};type WebhookQuestPayload = {
id: string; // quest ID (uuid V4)
name: string; // quest display name
categoryId: string; // category ID (uuid V4)
categoryName: string | null; // category display name
xp: number | null; // XP reward
published: boolean | null; // true if quest is published, false otherwise
autoValidate: boolean | null;
tasks: TaskPayload[];
lastReviewerId: string; // user ID (uuid V4)
};type WebhookQuestTaskInputPayload =
| { } // for task type 'visitLink', 'invites', 'discord', 'telegram', 'twitterFollow', 'twitterSpace'
| { value: string } // for task type 'text', 'date', 'url', 'opinion'
| { value: number } // for task type 'number'
| { values: string[] } // for task type 'poll', 'quiz'
| { fileUrls: string[] } // for task type 'fileUrls'
| { tweetId?: string } // for task type 'tweetReact', 'tweet'
| { requestId: string, statusCode: number } // for task type 'api'type WebhookSprintPayload = {
id: string; // sprint ID (uuid V4)
startingAt: ISOString; // sprint starting date - https://developer.mozilla.org/en-US/docs/Web/JavaScript/Reference/Global_Objects/Date/toISOString
endingAt: ISOString; // sprint ending date
};Securing webhooks
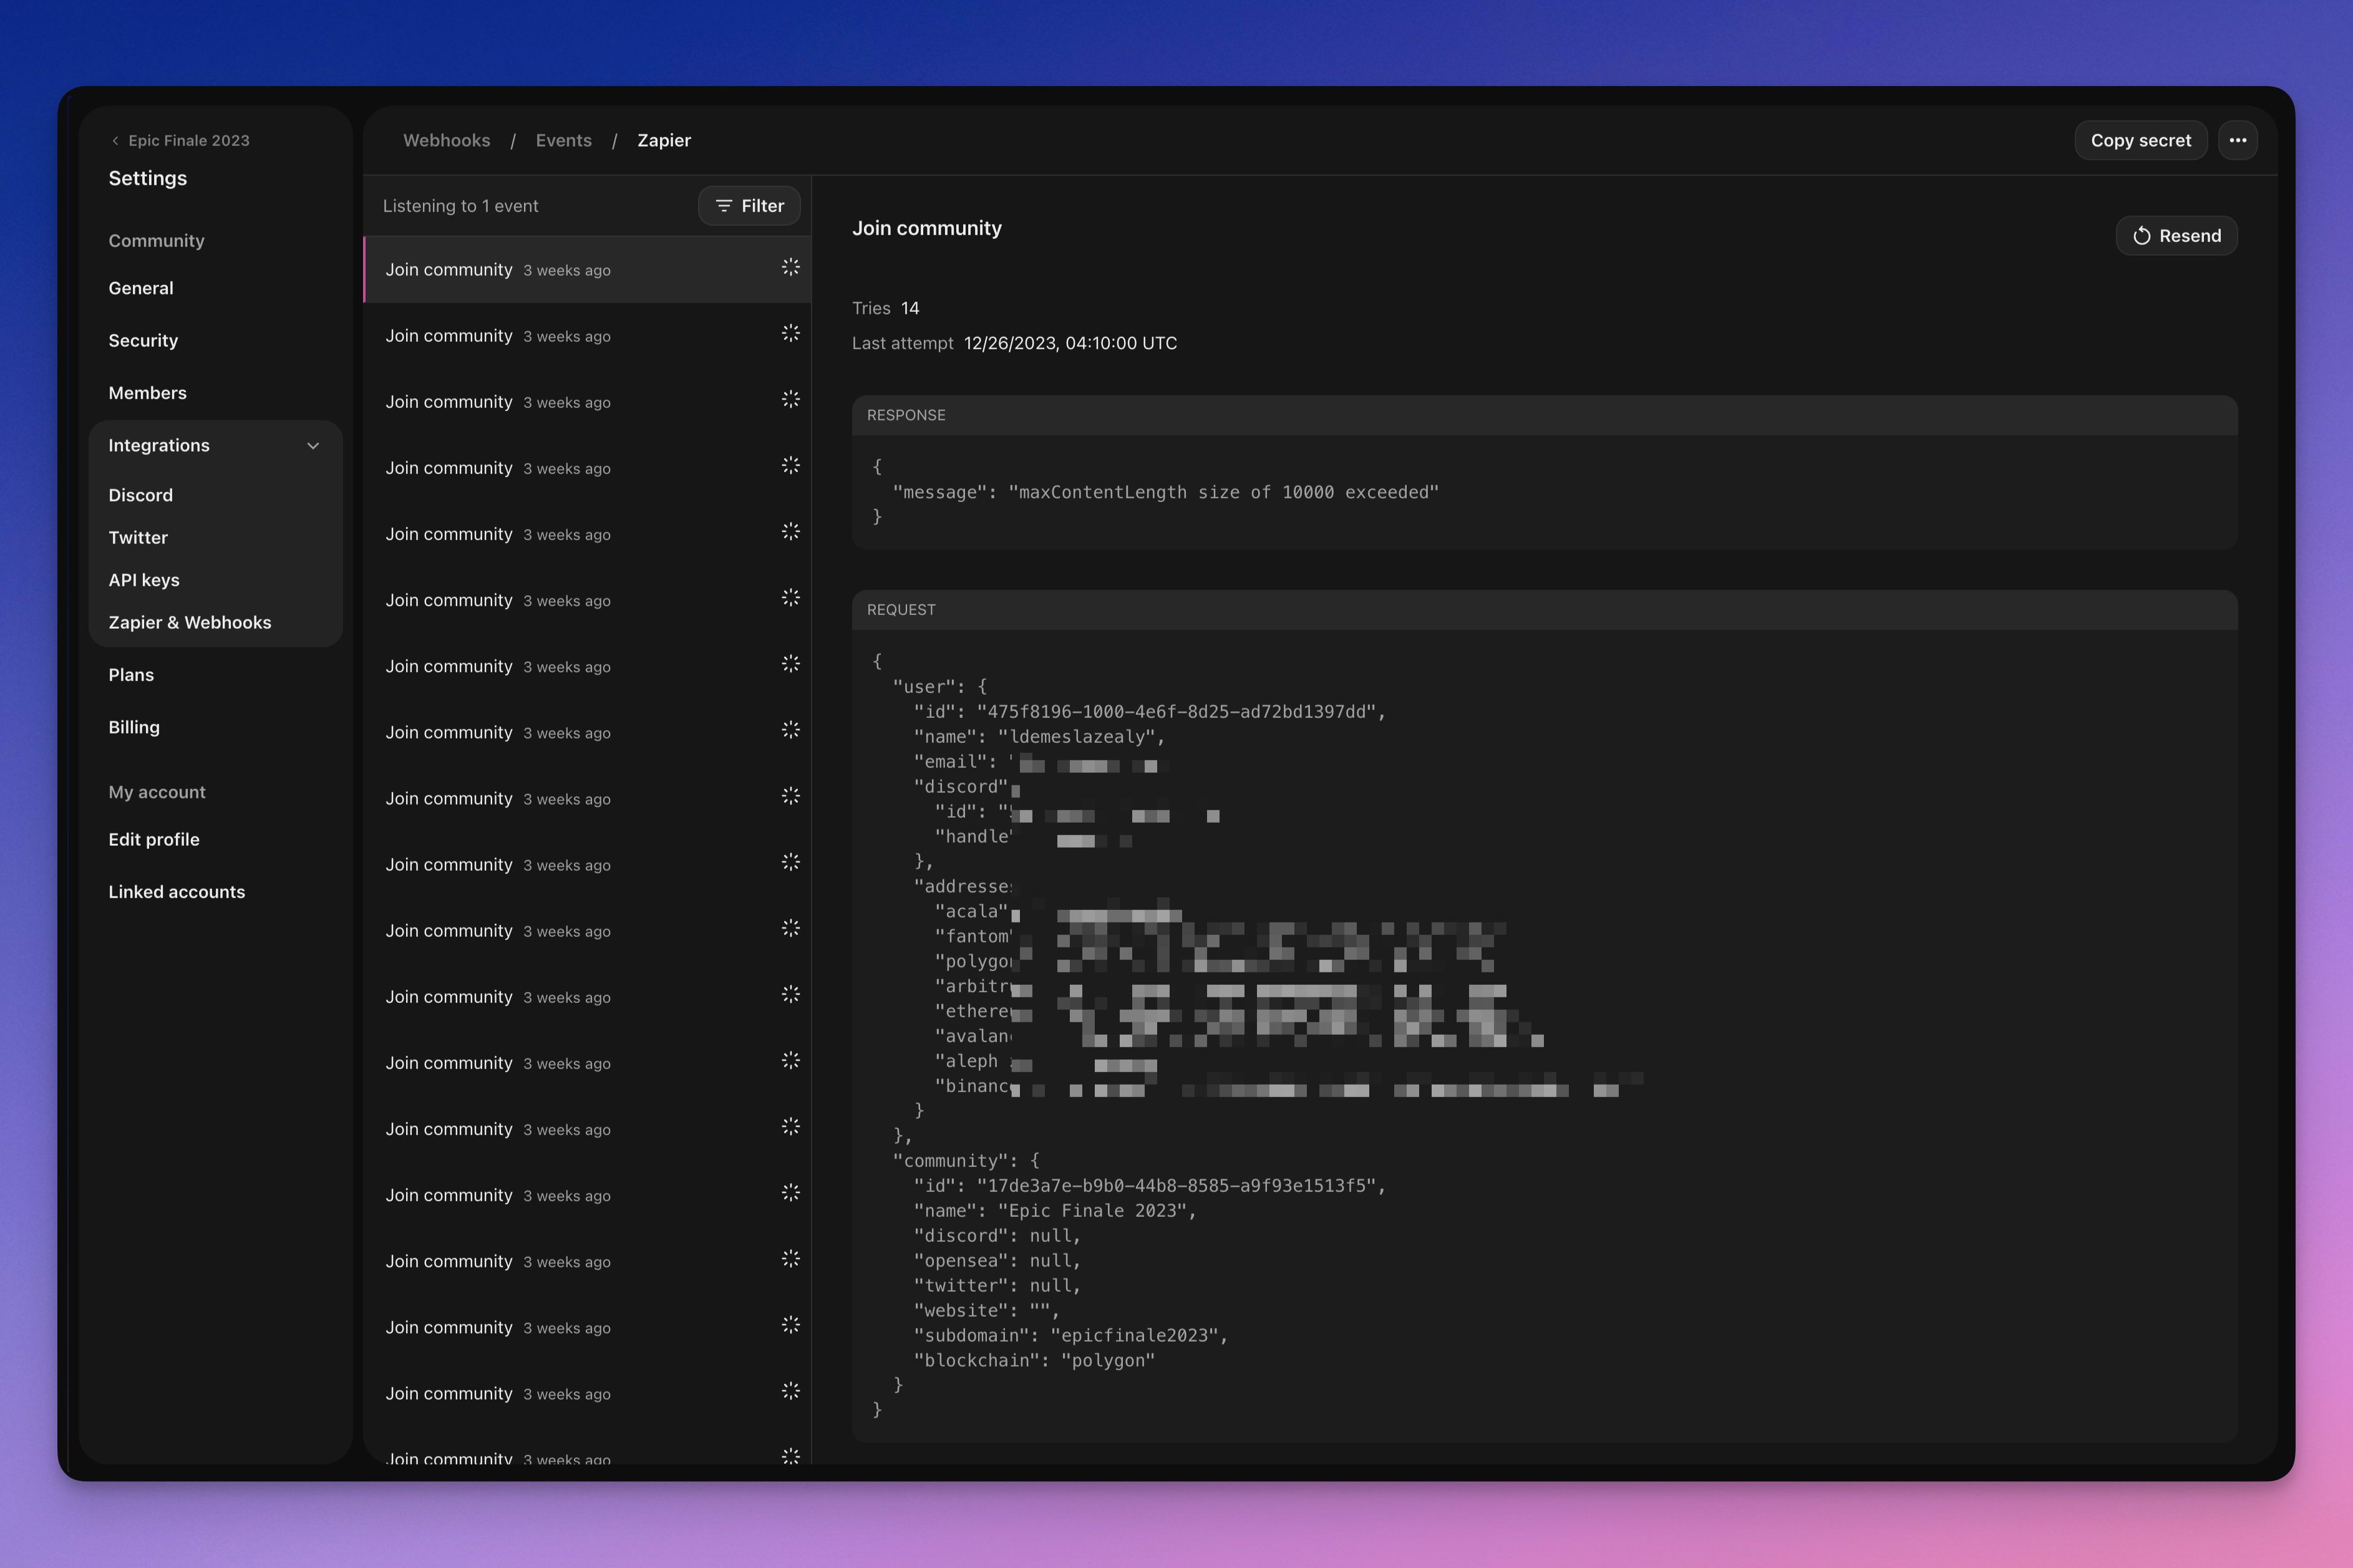
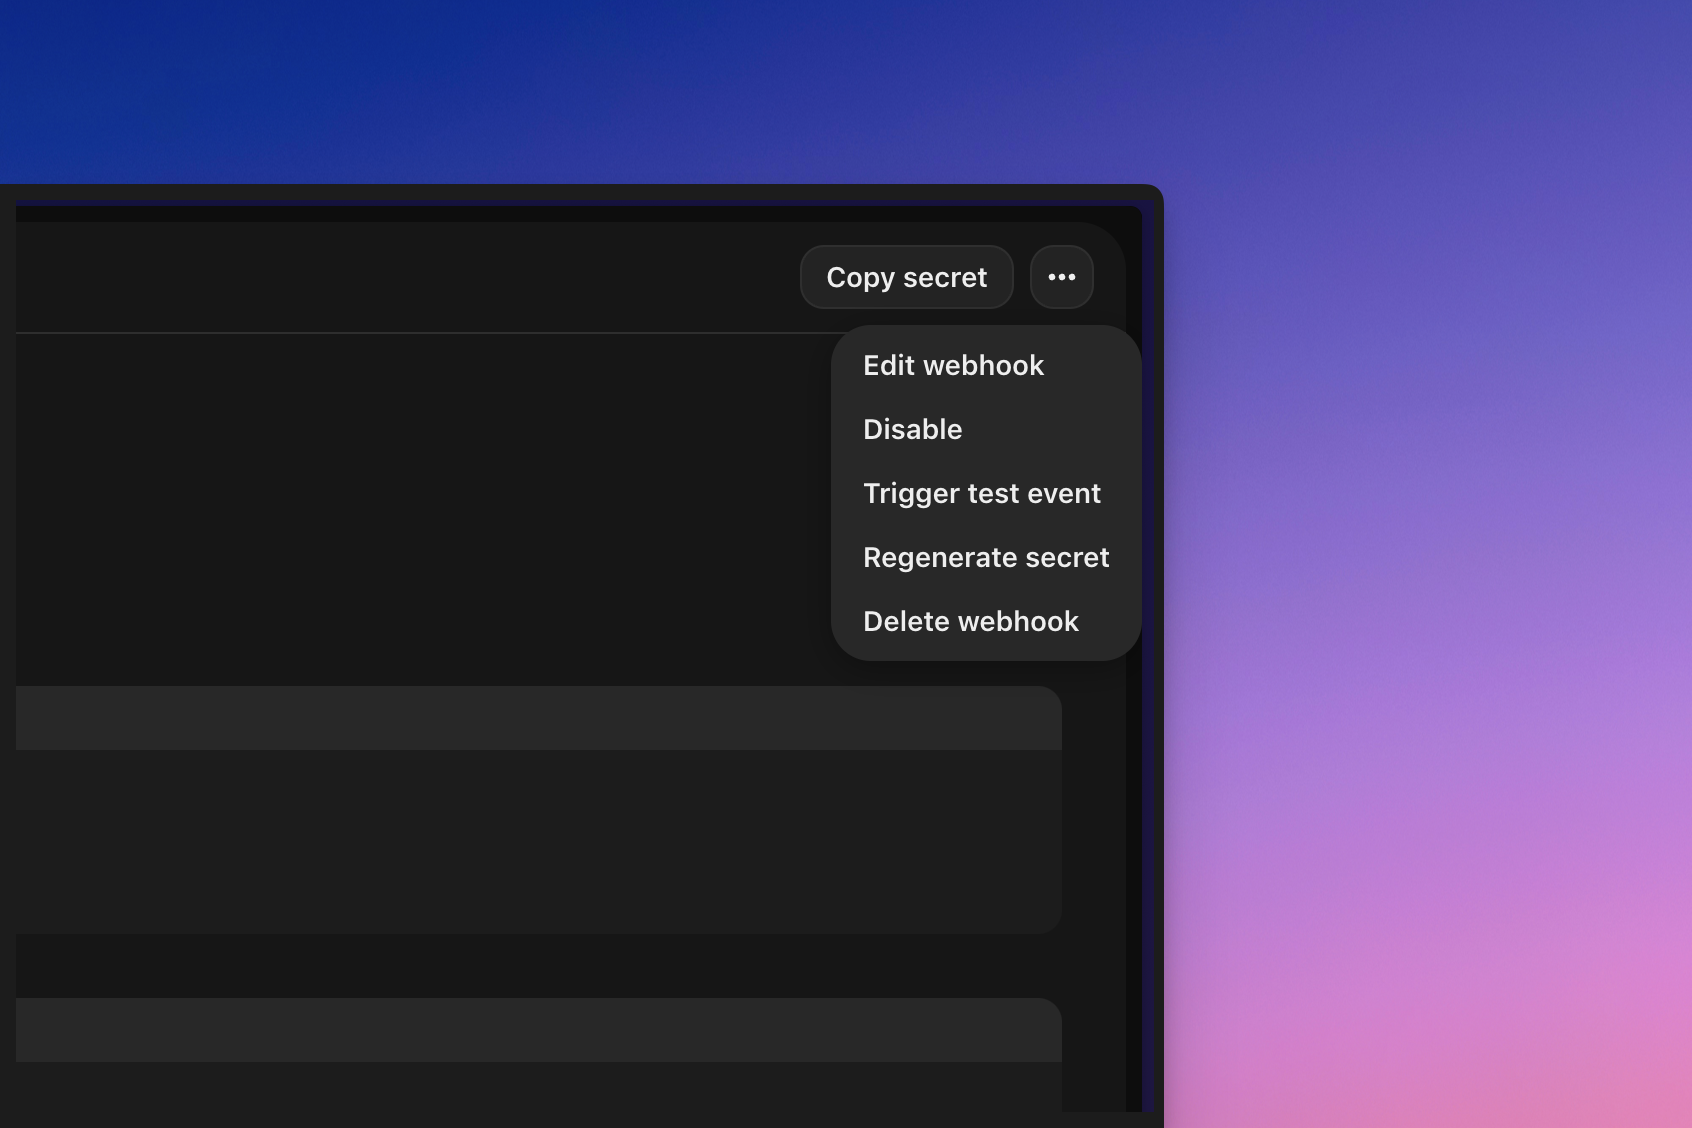
Creating a webhook will create a random secret that you can use to verify that the request is coming from Zealy webhooks. Copy the secret in the top right of the webhook inspect panel and verify that the secret set in the body of the POST request is the same.
In case the secret is leaked, you can regenerate it from the same page.
Testing webhooks
From the webhook’s inspect panel you can manually trigger a test event. Click the button in the top right and select ‘Send test event’. You will be able to select an event type among the monitored event types. An event will be triggered with mock data and the status displayed.
Debugging
You can see the logs of all past events triggered by the webhook if you click the webhook from the Webhooks page. Filtering by the status you can use the logs to debug if something went wrong. For each event, you can see the error message received and the request that was sent.
You can also retry any event from this page.