Webhook
Tingkatkan Kemampuan Zealy dengan Koneksi Webhook.
Oleh louis, Fredrika, benjamin
Di halaman ini
Webhook Zealy mengirim HTTP POST ke URL pilihan Anda saat salah satu dari sembilan peristiwa komunitas terjadi, di antaranya anggota bergabung, klaim quest berhasil atau gagal, sprint dimulai, dan pengguna diblokir. Setiap payload membawa id peristiwa, tipe, data, timestamp milidetik, dan secret yang membuktikan permintaan tersebut asli.
Dasar
Zealy menyediakan webhook yang memungkinkan Anda menerima notifikasi push HTTP setiap kali data dibuat atau diperbarui. Ini memungkinkan Anda membangun integrasi di atas Zealy. Anda dapat memicu build CI, melakukan perhitungan pada data quest, atau mengirim pesan pada kondisi tertentu – apa pun itu.
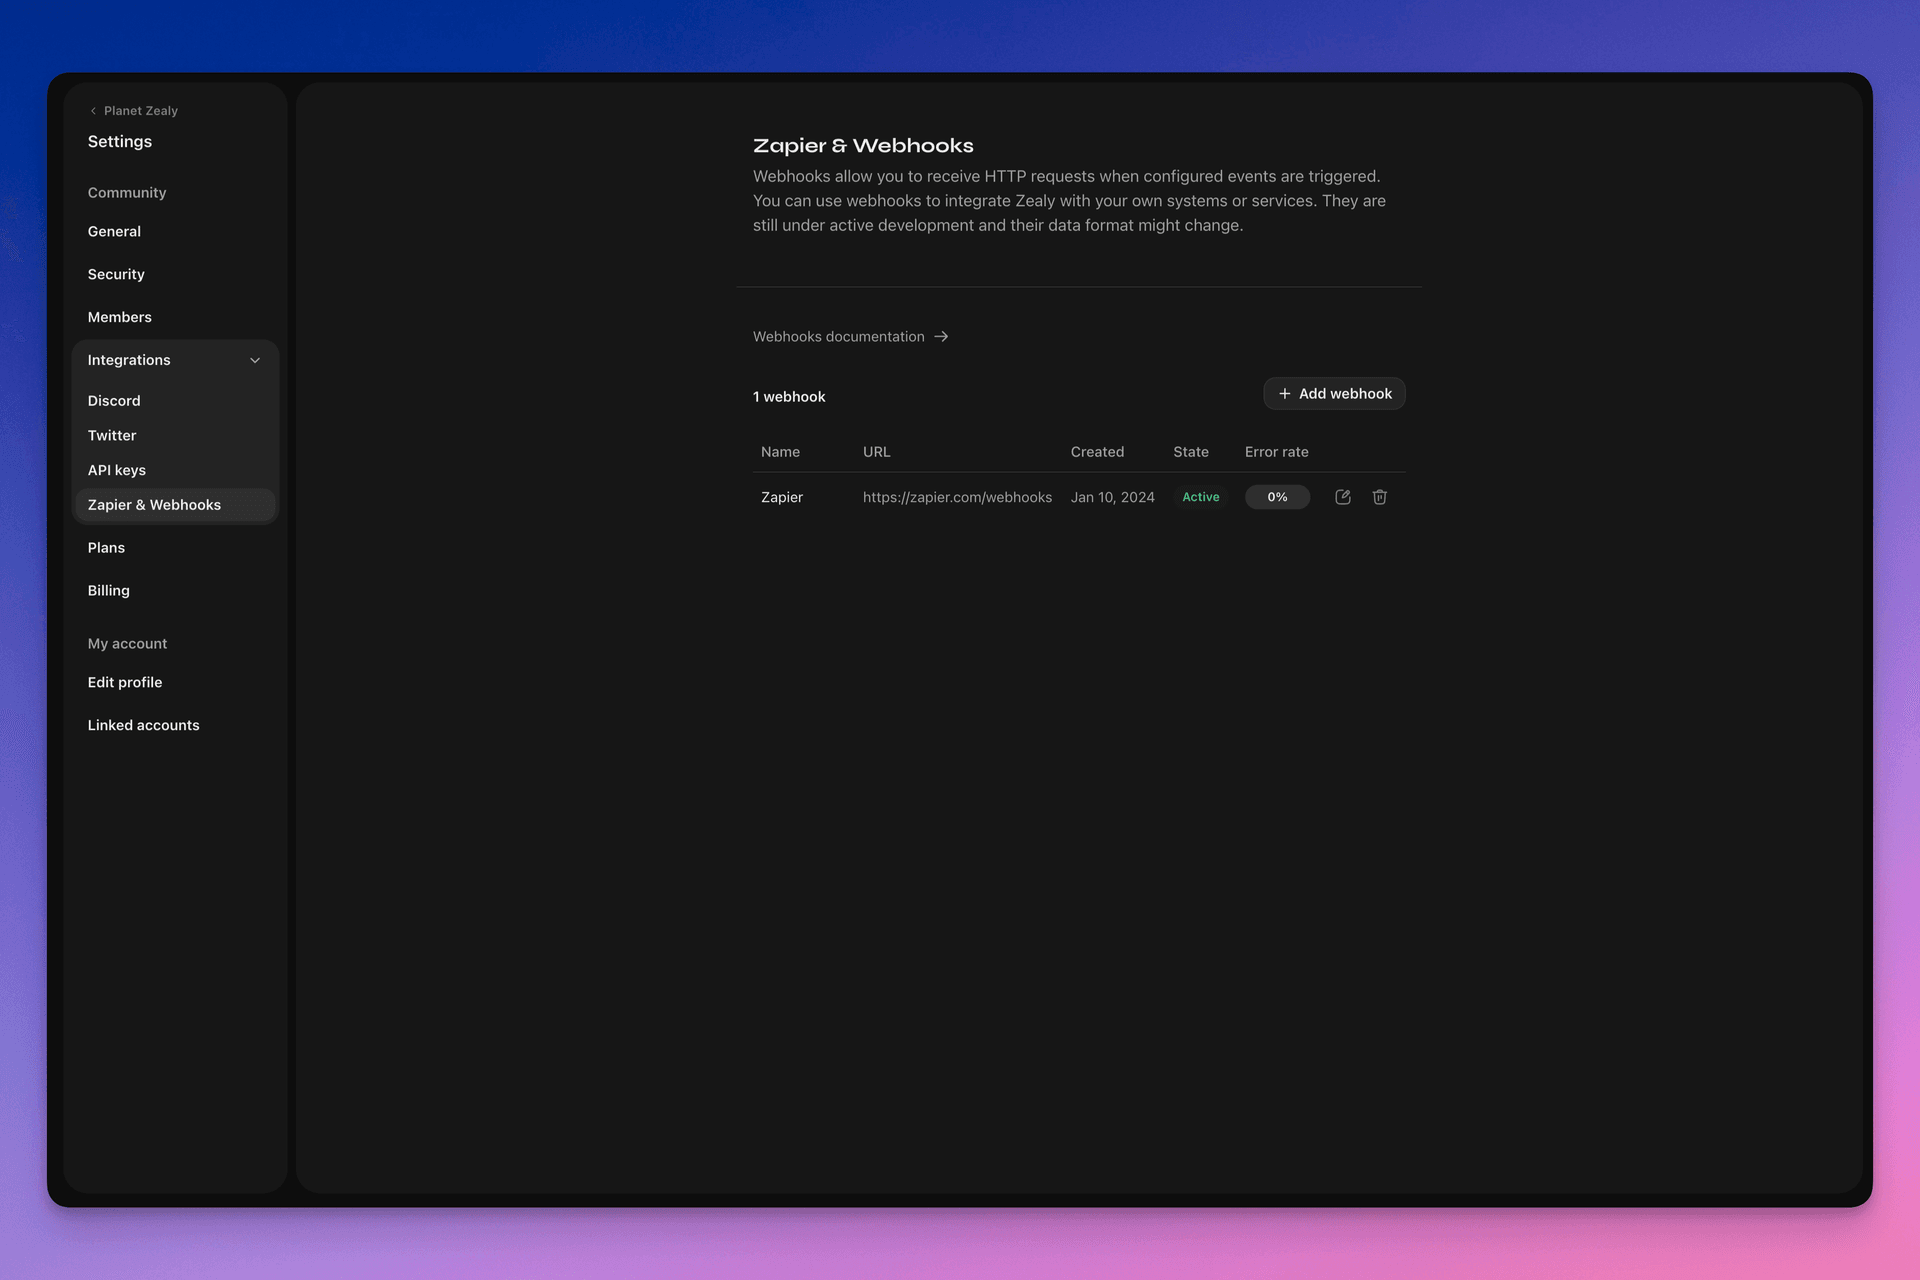
Silakan kunjungi Pengaturan > Integrasi > Zapier & Webhook untuk menyiapkan webhook Anda.
Bagaimana cara kerja Webhook?
Push Webhook hanyalah sebuah permintaan HTTP POST yang dikirim ke URL pilihan Anda. Push dipicu secara otomatis oleh Linear saat data diperbarui. Untuk contoh data yang terkandung dalam payload, lihat Payload Webhook.
Konsumen webhook Anda adalah endpoint HTTP sederhana. Endpoint tersebut harus memenuhi kondisi berikut:
- Tersedia di URL HTTPS yang dapat diakses publik, bukan localhost
- Akan merespons push Webhook Zealy (permintaan HTTP POST) dengan respons
HTTP 200("OK")
Jika pengiriman gagal (misalnya server tidak tersedia, respons memakan waktu lebih dari 5 detik, body respons lebih besar dari 5000 byte, atau merespons dengan kode status HTTP selain 200), push akan dicoba ulang 15 kali. Di sini digunakan penundaan backoff eksponensial: percobaan akan diulang setelah sekitar 10 menit, lalu 30 menit, dan seterusnya. Jika URL webhook terus tidak merespons, webhook mungkin dinonaktifkan oleh Zealy dan harus diaktifkan kembali secara manual.
Untuk memastikan Webhook POST benar-benar dibuat oleh Zealy, kami membuat secret acak yang akan dilampirkan pada body permintaan di field secret .
Untuk informasi tambahan tentang Webhook, ada beberapa sumber yang bagus:
- RequestBin: Webhooks – The Definitive Guide
- requestbin.com adalah alat yang bagus untuk menguji webhook
- GitHub Developer Guide: Webhooks
Untuk apa saya bisa menggunakannya?
- Integrasikan dengan Zapier
- Otomatiskan reward kustom
- Beri tahu quest yang menunggu peninjauan di Telegram
Dan masih banyak lagi!
Memulai dengan Webhook Zealy
- Identifikasi peristiwa mana yang ingin Anda pantau.
- Kembangkan fungsi endpoint webhook untuk menerima permintaan POST data peristiwa.
- Daftarkan endpoint Anda di Zealy menggunakan Dasbor Webhook di Pengaturan > Integrasi > Zapier & Webhook.
- Amankan endpoint webhook Anda.
Membuat konsumen Webhook sederhana
Anda mungkin mempertimbangkan menggunakan sesuatu seperti Netlify Functions, yang menyediakan cara mudah untuk men-deploy endpoint HTTP(S) sederhana: https://www.netlify.com/blog/2018/09/13/how-to-run-express.js-apps-with-netlify-functions/.
// server.js
//
// Use this sample code to handle webhook events in your integration.
//
// 1) Paste this code into a new file (server.js)
//
// 2) Install dependencies
//   npm install express
//
// 3) Run the server on http://localhost:4242
//   node server.js

// The library needs to be configured with your account's secret key.
// Ensure the key is kept out of any version control system you might be using.
const express = require('express');
const app = express();

// This is your Zealy webhook secret for testing your endpoint locally.
const endpointSecret = '5888a6800dbac634e52d8504f097e064';

app.post('/webhook', express.raw({ type: 'application/json' }), (request, response) => {
  const payload = req.body;
  // Does createdAt make more sense than time?
  const { id, type, data, time, secret } = payload;

  if (secret === endpointSecret) {
    // Do something neat with the data received!
  }

  // Return a 200 response to acknowledge receipt of the event
  response.send();
});

app.listen(4242, () => console.log('Running on port 4242'));
Mengonfigurasi di pengaturan
Siapkan webhook dan peristiwa yang harus dipantaunya di Pengaturan > Integrasi > Webhook.
Payload webhook
Payload HTTP webhook akan menyertakan informasi baik di header HTTP maupun body permintaannya.
Payload akan dikirim dengan header HTTP berikut:
User-Agent: Zealy-Webhook
Content-Type: application/json; charset=utf-8
{
  id: string // unique ID for this event (UUID v4)
  type: "JOINED_COMMUNITY" | "LEFT_COMMUNITY" | "QUEST_SUCCEEDED" | "QUEST_CLAIMED" | "QUEST_FAILED" | "QUEST_CLAIM_STATUS_UPDATED" | "SPRINT_STARTED" | "SPRINT_ENDED" | "USER_BANNED", // event type
  data: EventData, // event data, see below
  time: number, // timestamp, in milliseconds
  secret: string, // secret generated when you created your webhook, used for checking origin
}
Field EventData per peristiwa:
// JOINED_COMMUNITY
type JoinedCommunityEventData = {
  community: WebhookCommunityPayload;
  user: WebhookUserPayload;
};

// LEFT_COMMUNITY
type LeftCommunityEventData = {
  community: WebhookCommunityPayload;
  user: WebhookUserPayload;
};

// QUEST_SUCCEEDED
type QuestSucceededEventData = {
  community: WebhookCommunityPayload;
  user: WebhookUserPayload;
  quest: WebhookQuestPayload;
  taskInputs?: Array<{
    taskId: string, // task ID (uuid v4)
    taskType: 'number' | 'date' | 'api' | 'text' | 'discord' | 'url' | 'telegram' | 'quiz' | 'invites' | 'visitLink' | 'file' | 'poll' | 'opinion' | 'twitterFollow' | 'twitterSpace' | 'tweetReact' | 'tweet',
    input: WebhookQuestTaskInputPayload,
  }>;
  status: 'success';
};

// QUEST_CLAIMED
type QuestClaimedEventData = {
  community: WebhookCommunityPayload;
  user: WebhookUserPayload;
  quest: WebhookQuestPayload;
  taskInputs?: Array<{
    taskId: string, // task ID (uuid v4)
    taskType: 'number' | 'date' | 'api' | 'text' | 'discord' | 'url' | 'telegram' | 'quiz' | 'invites' | 'visitLink' | 'file' | 'poll' | 'opinion' | 'twitterFollow' | 'twitterSpace' | 'tweetReact' | 'tweet',
    input: WebhookQuestTaskInputPayload,
  }>;
};

// QUEST_FAILED
type QuestFailedEventData = {
  community: WebhookCommunityPayload;
  user: WebhookUserPayload;
  quest: WebhookQuestPayload;
  taskInputs?: Array<{
    taskId: string, // task ID (uuid v4)
    taskType: 'number' | 'date' | 'api' | 'text' | 'discord' | 'url' | 'telegram' | 'quiz' | 'invites' | 'visitLink' | 'file' | 'poll' | 'opinion' | 'twitterFollow' | 'twitterSpace' | 'tweetReact' | 'tweet',
    input: WebhookQuestTaskInputPayload,
  }>;
};

// QUEST_CLAIM_STATUS_UPDATED
type QuestClaimStatusUpdatedEventData = {
  community: WebhookCommunityPayload;
  user: WebhookUserPayload;
  quest: WebhookQuestPayload;
  taskInputs?: Array<{
    taskId: string, // task ID (uuid v4)
    taskType: 'number' | 'date' | 'api' | 'text' | 'discord' | 'url' | 'telegram' | 'quiz' | 'invites' | 'visitLink' | 'file' | 'poll' | 'opinion' | 'twitterFollow' | 'twitterSpace' | 'tweetReact' | 'tweet',
    input: WebhookQuestTaskInputPayload,
  }>;
  status: 'success' | 'pending' | 'failed';
};

// SPRINT_STARTED
type SprintStartedEventData = {
  community: WebhookCommunityPayload;
  sprint: WebhookSprintPayload;
};

// SPRINT_ENDED
type SprintEndedEventData = {
  community: WebhookCommunityPayload;
  sprint: WebhookSprintPayload;
};

// USER_BANNED
type UserBannedEventData = {
  community: WebhookCommunityPayload;
  user: WebhookUserPayload;
};
Entitas umum:
type WebhookCommunityPayload = {
  id: string; // community ID (uuid V4)
  name: string; // community name
  subdomain: string; // community subdomain
  blockchain: string;
  discord: string | null; // discord URI of the community, e.g., https://discord.gg/zealy
  twitter: string | null; // twitter handle of the community, e.g., zealy_io
  website: string | null; // website URI of the community
};
type WebhookUserPayload = {
id: string; // user ID (uuid V4)
name: string | null; // user display name
twitter: {
id: string; // user twitter ID
username: string | null; // user twitter handle
} | null;
discord: {
id: string; // user discord ID
handle: string | null; // user discord handle
} | null;
email: string | null; // user email
addresses: Dict<string>; // key/value dictionary for wallets
verifiedAddresses: Dict<string>; // key/value dictionary for all users verified wallets
};type WebhookQuestPayload = {
id: string; // quest ID (uuid V4)
name: string; // quest display name
categoryId: string; // category ID (uuid V4)
categoryName: string | null; // category display name
xp: number | null; // XP reward
published: boolean | null; // true if quest is published, false otherwise
autoValidate: boolean | null;
tasks: TaskPayload[];
lastReviewerId: string; // user ID (uuid V4)
};type WebhookQuestTaskInputPayload =
| { } // for task type 'visitLink', 'invites', 'discord', 'telegram', 'twitterFollow', 'twitterSpace'
| { value: string } // for task type 'text', 'date', 'url', 'opinion'
| { value: number } // for task type 'number'
| { values: string[] } // for task type 'poll', 'quiz'
| { fileUrls: string[] } // for task type 'fileUrls'
| { tweetId?: string } // for task type 'tweetReact', 'tweet'
| { requestId: string, statusCode: number } // for task type 'api'type WebhookSprintPayload = {
id: string; // sprint ID (uuid V4)
startingAt: ISOString; // sprint starting date - https://developer.mozilla.org/en-US/docs/Web/JavaScript/Reference/Global_Objects/Date/toISOString
endingAt: ISOString; // sprint ending date
};Mengamankan webhook
Membuat webhook akan membuat secret acak yang dapat Anda gunakan untuk memverifikasi bahwa permintaan berasal dari webhook Zealy. Salin secret di kanan atas panel inspeksi webhook dan verifikasi bahwa secret yang diatur di body permintaan POST sama.
Jika secret bocor, Anda dapat membuatnya ulang dari halaman yang sama.

Menguji webhook
Dari panel inspeksi webhook, Anda dapat memicu peristiwa uji secara manual. Klik tombol di kanan atas dan pilih 'Kirim peristiwa uji'. Anda akan dapat memilih tipe peristiwa di antara tipe peristiwa yang dipantau. Peristiwa akan dipicu dengan data tiruan dan statusnya ditampilkan.
Debugging
Anda dapat melihat log semua peristiwa lampau yang dipicu oleh webhook jika Anda mengklik webhook dari halaman Webhook. Dengan memfilter berdasarkan status, Anda dapat menggunakan log untuk men-debug jika terjadi kesalahan. Untuk setiap peristiwa, Anda dapat melihat pesan error yang diterima dan permintaan yang dikirim.
Anda juga dapat mencoba ulang peristiwa apa pun dari halaman ini.
