API
在外部平台上自动化操作
作者 Fredrika
本页内容
概述
本指南介绍 API 任务。您可以在此处找到完整的 API 文档 这里.
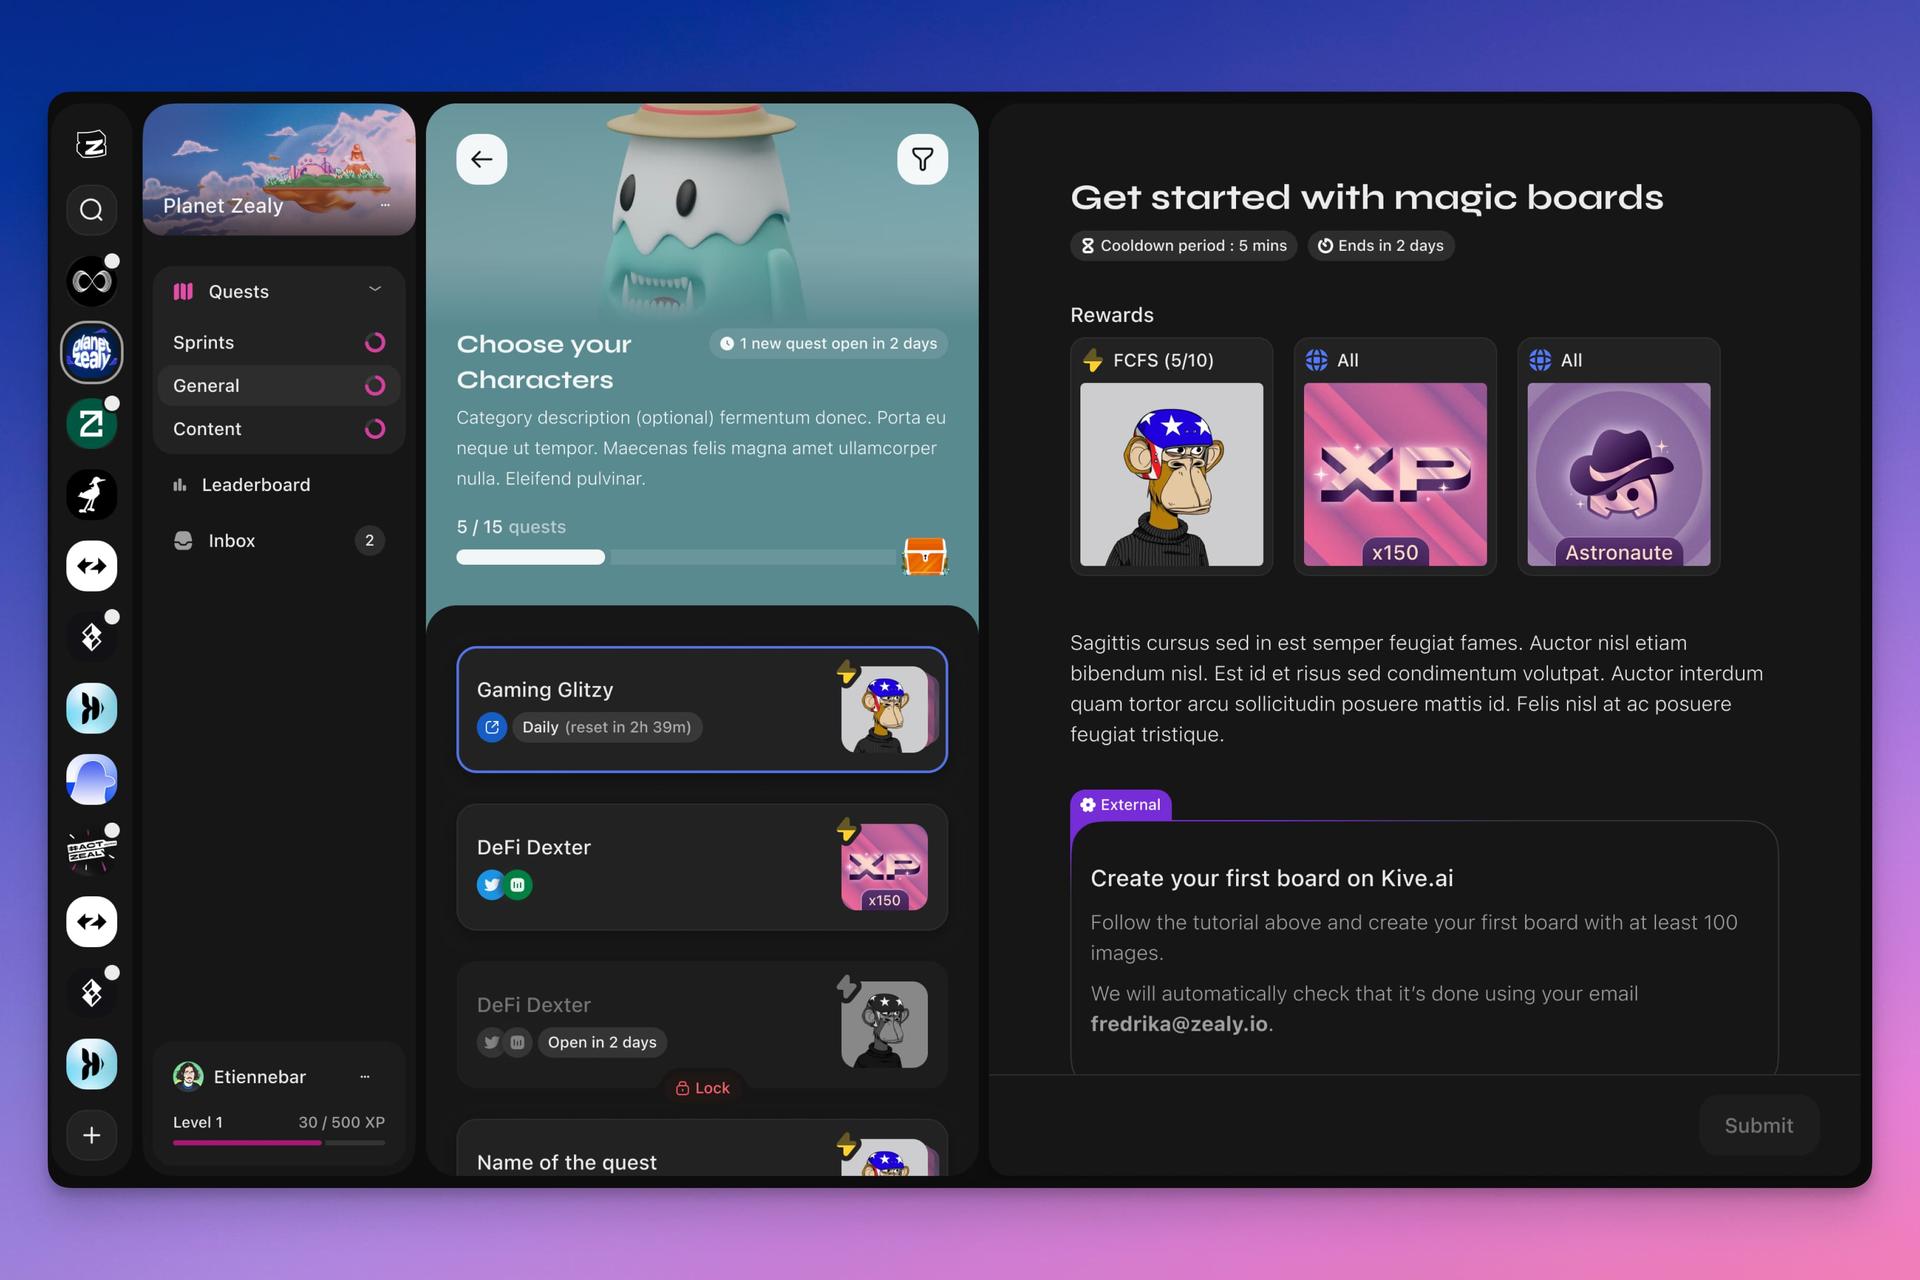
API 任务用于在外部平台上自动化任务。您可以用它来确认用户已注册或已购买、已为 GitHub 上的问题提交 PR,或添加 Reddit 支持。可能性无穷无尽。要开始并试用我们提供的功能,我们提供了一个基本端点,您可以用它与其他 Zealy 社区建立合作。请在下方了解如何设置。
基础
创建“API”任务
- 点击 “添加任务”.
- 选择 “Api”.
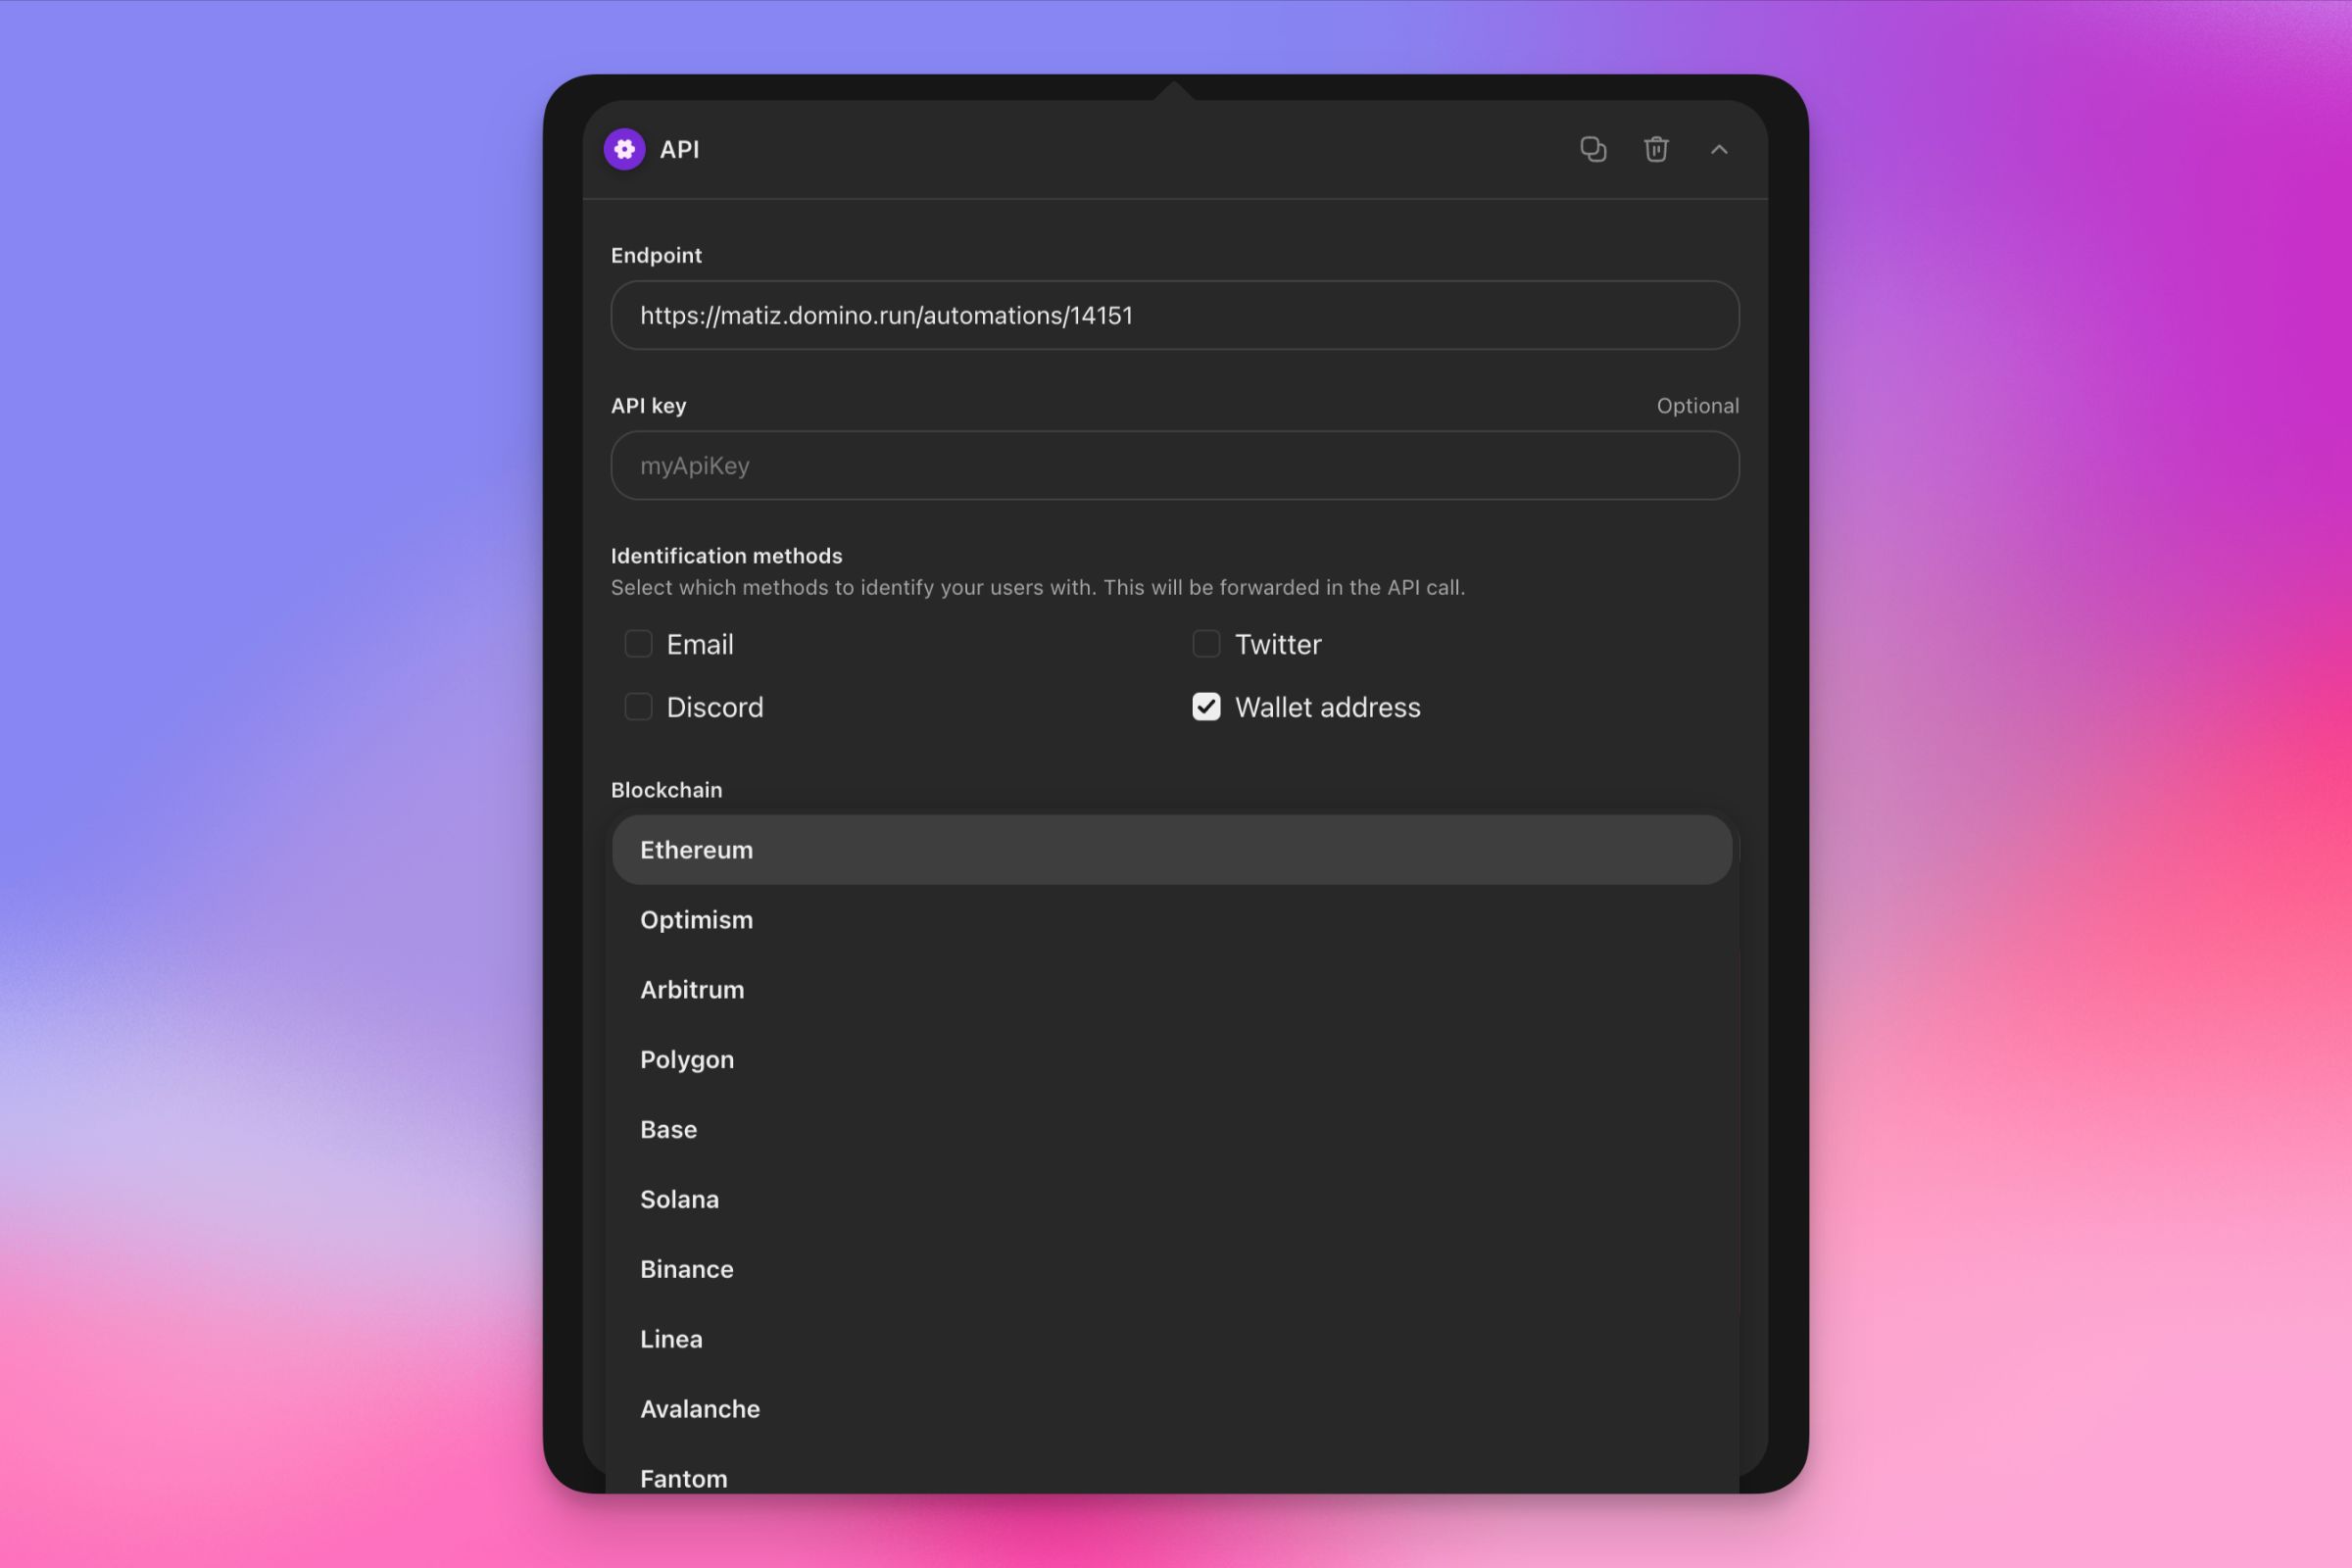
- 定义要调用的端点,以及可选的 API 密钥。
- 选择用户识别方式。您可以从以下选项中选择: 邮箱, Twitter, Discord, 钱包地址或 Zealy Connect.
- 如果选择 钱包连接,您还可以选择使用哪个网络。
-
如果选择 Zealy Connect,请按照以下步骤操作:
- 定义重定向 URL: 此 URL 将用于身份验证。我们会将用户重定向到此 URL,以便他们在您的系统中进行身份验证。
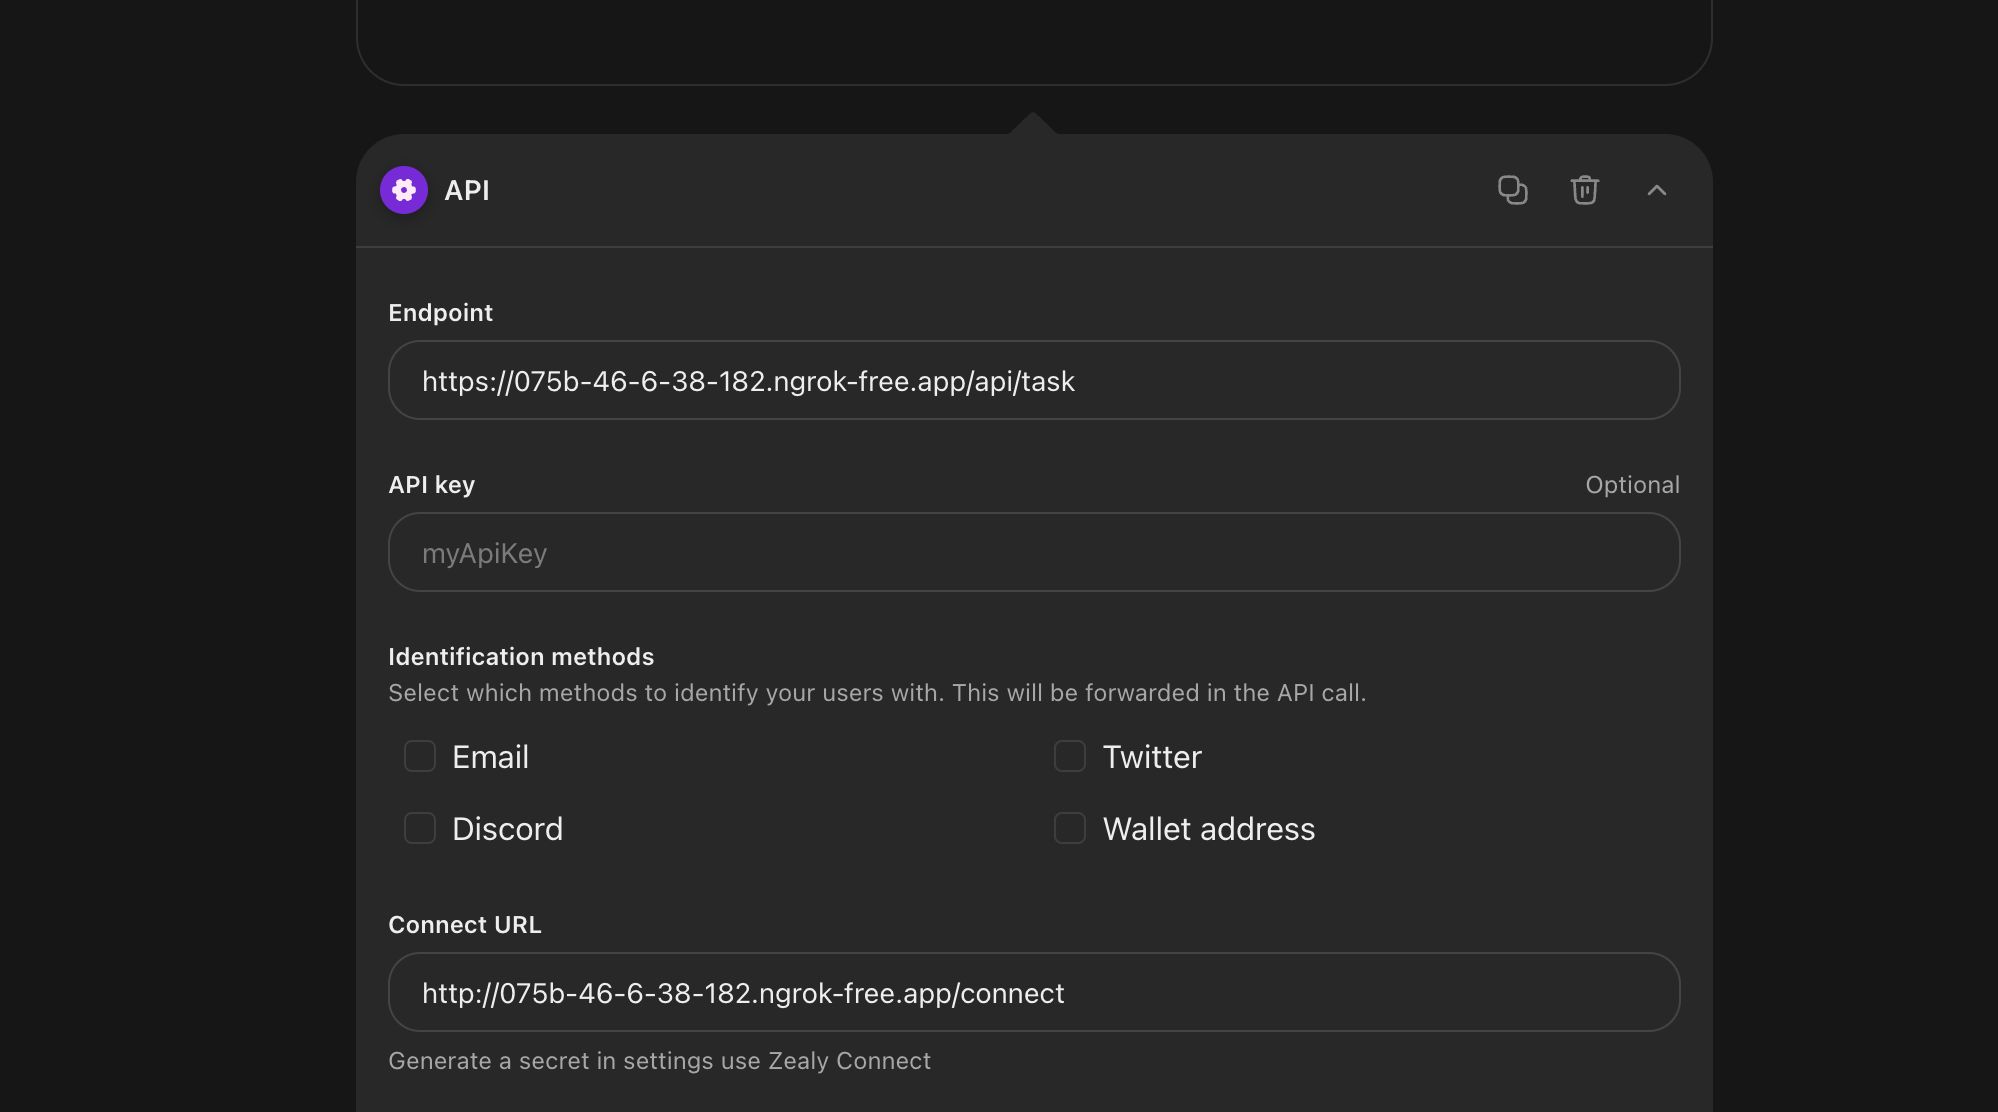
- 生成社区密钥: 生成社区密钥是 Zealy Connect 正常工作所必需的。您可以在社区设置的 Zealy Connect 设置 下的 集成部分 中创建密钥。
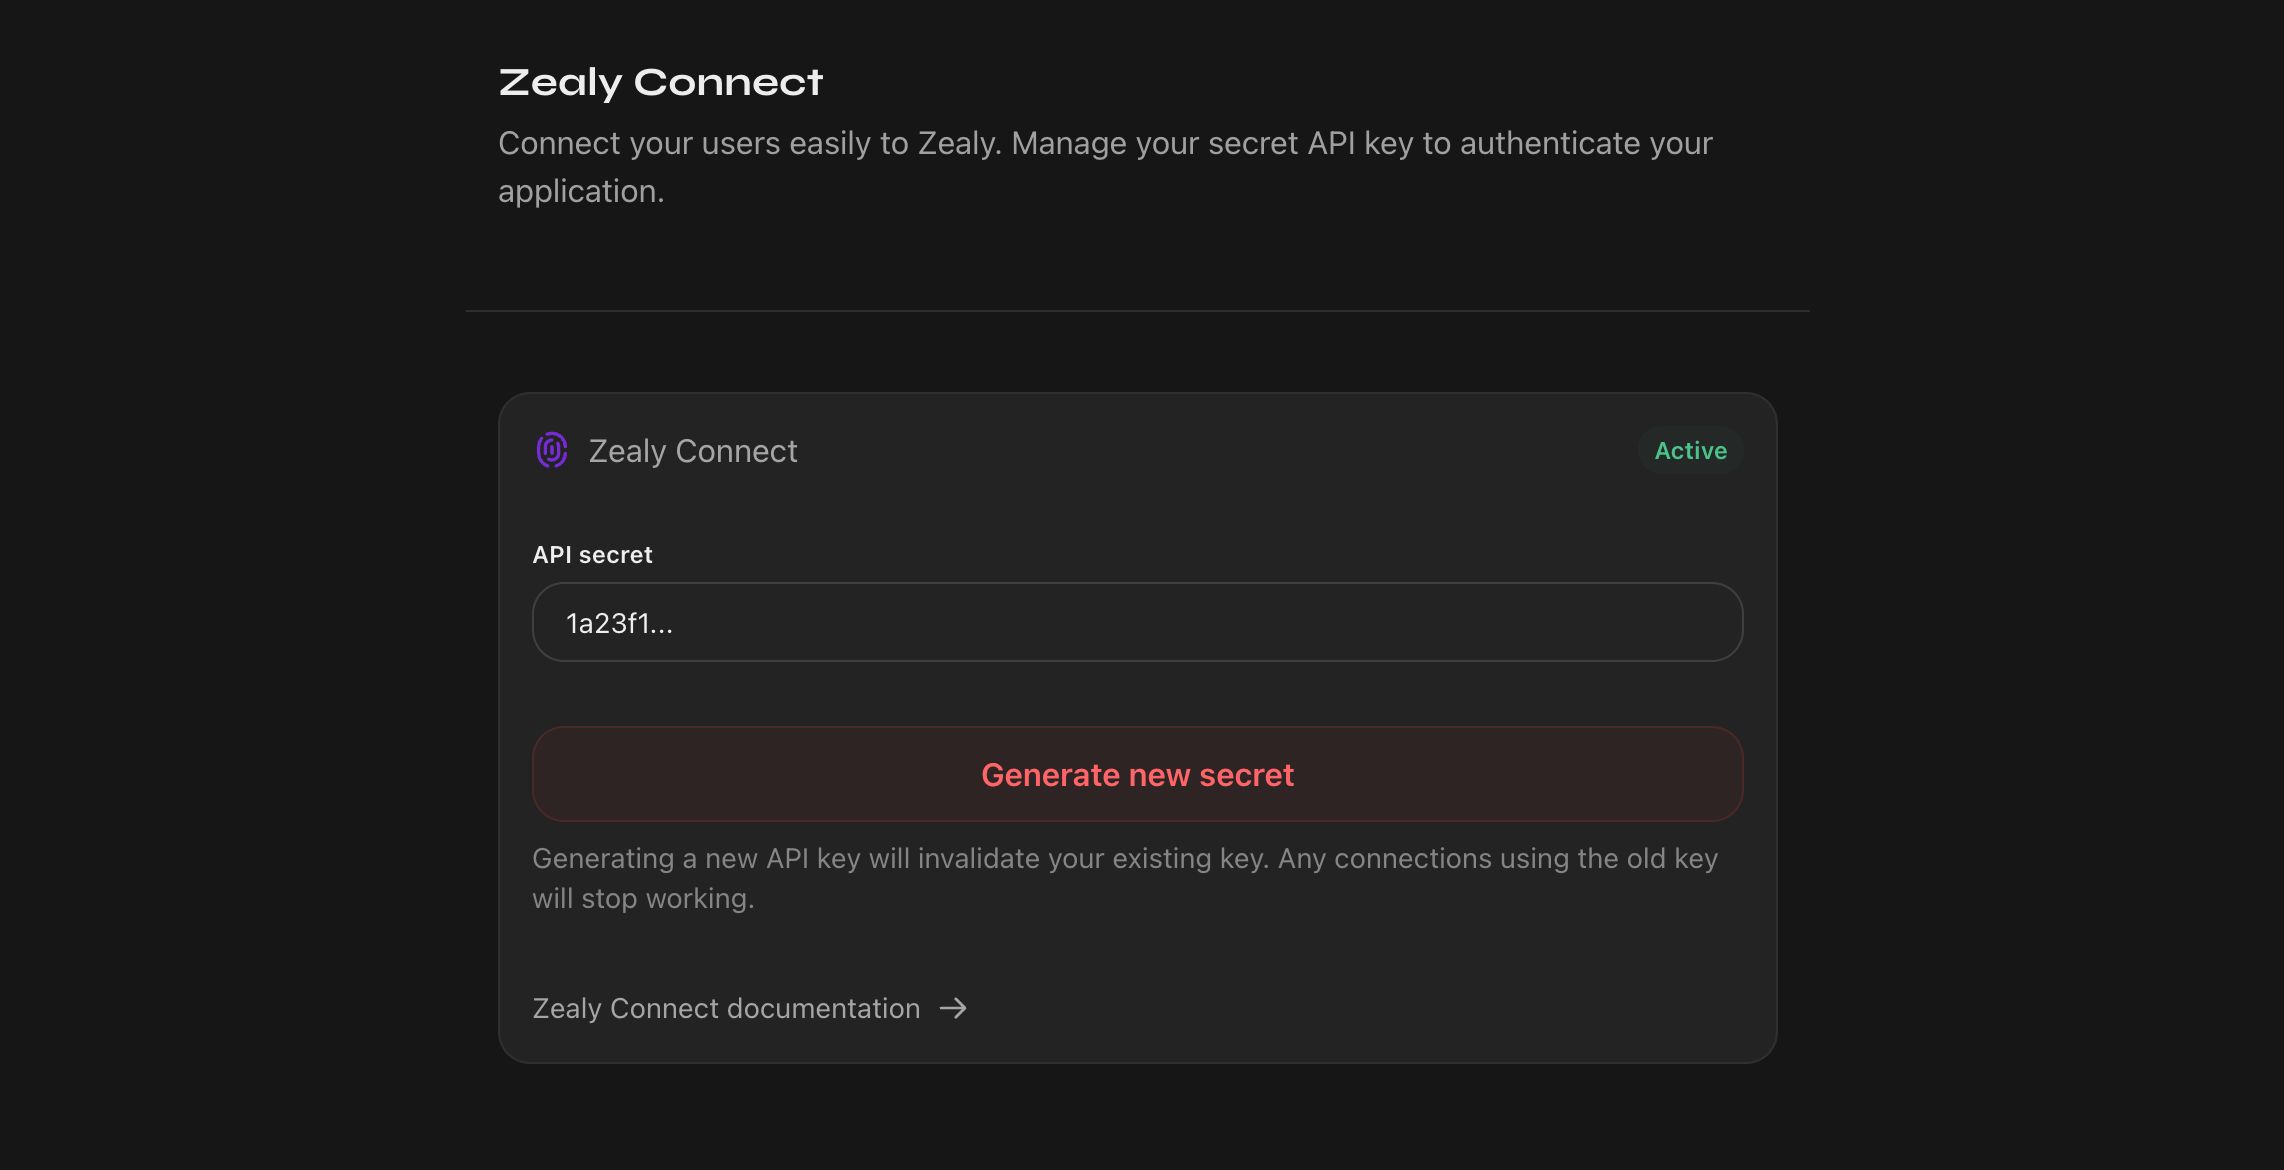
有关 API 预期工作方式的详细信息,请参阅 API 文档 ;有关管理 Zealy Connect 的指导,请参阅 Zealy Connect 文档.
与 Domino 集成
Domino 是 Web3 版的 Zapier。它允许您扩展 Zealy 的功能,并自动审核原生不支持的任务,例如:
- 检查用户的 Twitter 名称或简介是否包含特定词语
- 检查用户的 NFT 和代币余额
- 验证用户是否在 Discord 上邀请了特定数量的人
- 以及更多
查看他们的 文档 以进行集成。
端点测试
配置端点时,我们会自动运行以下测试,以确保端点按预期工作:
- 检查调用是否不超过 10 秒
- 验证错误消息格式是否正确,以便我们向用户显示
- 确保没有出现任何意外的状态码。端点应只返回 200 或 400。
创建自定义端点
请求
您可以将 API 任务与接受以下请求体的自定义 POST 端点一起使用:
{
  /**
   * The user id on Zealy
   */
  userId: string;
  /**
   * Your community id on Zealy, if you use the endpoint
   * on multiple communities this might be useful
   */
  communityId: string;
  /**
   * Your community's subdomain on Zealy, if you use the endpoint
   * on multiple communities this might be useful
   */
  subdomain: string;
  /**
   * The id of the quest
   */
  questId: string;
  /**
   * This will be generated on every claim as a way to look up an error.
   * It will also be displayed for the user when a claim fails.
   */
  requestId: string;
  /**
   * Accounts will be sent if at least one identification method has been configured
   */
  accounts?: {
    /**
     * The user's email address
     */
    email?: string;
    /**
     * The user's Ethereum wallet address that he has authenticated with
     */
    wallet?: string;
    /**
     * The user's Discord id and handle
     */
    discord?: {
      id: string;
      handle: string;
    };
    /**
     * The user's Twitter id and username
     */
    twitter?: {
      id: string;
      username: string;
    };
    /**
     * Your platform user ID stored as part of the Zealy Connect integration
    */
    zealy-connect: string
  };
}
您可以使用创建任务时设置的 API 密钥来保护它。API 密钥将像这样在请求头中发送:
{
  "X-Api-Key": apiKey,
}
响应
如果用户已成功执行操作,您应返回 200 状态。然后用户将成功领取任务。
{
  "message": "User completed the action"
}
否则,响应中应返回 400 状态,并在响应体中附带一条消息。该消息将与生成的 requestId 一起显示,以帮助您和用户调试问题。请确保消息尽可能具有描述性。
{
  "message": "We could not find a user with email kenny@zealy.io"
}
代码示例
// server.js
//
// Use this sample code to handle quest verification in your endpoint.
//
// 1) Paste this code into a new file (server.js)
//
// 2) Install dependencies
//   npm install express
//
// 3) Run the server on http://localhost:3000
//   node server.js

const express = require('express');
const app = express();

const apiKey = '5888a6800dbac634e52d8504f097e064'; // Replace with your API key configured in Zealy task

app.post('/claim', express.raw({ type: 'application/json' }), (req, res) => {
  const payload = req.body;
  const headers = req.headers

  if (apiKey !== headers['x-api-key']) {
    throw new Error('Invalid API Key')
  }


  const success = true; // Replace with custom logic

  if (!success) {
    return res.status(400).send({
      message: 'Validation failed' // Replace with custom error message - will be displayed to the user
    })
  }

  return res.status(200).send({
    message: "Quest completed"
  })
});

app.listen(3000, () => console.log('Running on port 3000'));
使用 ngrok 进行本地测试
在本地开发和测试自定义端点时,您需要一种将本地服务器暴露到互联网的方法,以便 Zealy 可以向其发送 API 请求。ngrok 是一个创建到 localhost 的安全隧道的工具,非常适合此目的。请按照以下步骤设置 ngrok 并测试您的端点:
第 1 步:安装 ngrok 从 ngrok 网站下载 ngrok。 按照适用于您操作系统的安装说明进行操作。
第 2 步:设置 ngrok 注册一个免费的 ngrok 账户,并从 ngrok 仪表板获取您的 authtoken。 在终端中运行 ngrok authtoken YOUR_AUTH_TOKEN 来连接您的 ngrok 账户,将 YOUR_AUTH_TOKEN 替换为来自 ngrok 仪表板的令牌。
第 3 步:启动本地服务器 确保托管端点的本地服务器正在运行。例如,如果您的服务器是 Node.js 应用,您可能会运行 node server.js。
第 4 步:使用 ngrok 暴露本地服务器
打开一个新的终端窗口,并使用以下命令启动一个指向本地服务器端口(例如 3000)的 ngrok 隧道: ngrok http http://127.0.0.1:3000。
ngrok 将在终端中显示一个转发 URL(例如, https://abc123.ngrok.io)。这是 Zealy 用来访问您本地服务器的公共 URL。
第 5 步:在 Zealy 中配置您的 API 任务 在 Zealy 中设置 API 任务时,使用 ngrok 转发 URL 作为端点 URL。确保附加任何必需的路径,例如, https://abc123.ngrok.io/claim.
注意: 请记住,ngrok URL 是临时的,每次重启 ngrok 时都会更改,除非您拥有支持自定义子域名的付费订阅。每次重启 ngrok 时,请确保更新 Zealy 中的端点。
按照这些步骤,您可以在将自定义端点部署到生产服务器之前,在本地开发环境中轻松测试和调试它。
Zealy Connect 集成
使用 Zealy Connect 时,我们会将用户重定向到任务设置期间指定的 URL。我们将包含以下查询参数:
zealyUserId:Zealy 系统中用户的唯一标识符,用于将其与您的平台关联。callback:身份验证完成后将用户重定向回的 URL,以便他们可以领取任务。signature:用于验证请求真实性的 SHA-256 哈希,确保请求源自 Zealy。
以下是一个完整的示例端点,您可以将其用作起点:
const YOUR_COMMUNITY_SECRET = "fdb68b155a1ccf2e636c7cd7e0816530"; // Replace with your secret generated in Settings > Integrations > Zealy Connect

app.get("/connect", (req, res) => {
  // Extract the query parameters
  const { zealyUserId, signature, callbackUrl } = req.query;

  /**
   * Verifying signature to ensure the request is coming from Zealy
   */
  const fullUrl = new URL(
    `${req.protocol}://${req.get("host")}${req.originalUrl}`
  );
  fullUrl.searchParams.delete("signature");

  const hmac = crypto.createHmac("sha256", YOUR_COMMUNITY_SECRET);
  hmac.update(fullUrl.toString());
  const generatedSignature = hmac.digest("hex");

  if (generatedSignature !== signature){
    return res.status(400).send("Invalid signature");
  }

  /**
   * Redirect to login if the user is not authenticated
   */
  if (!req.session.user) {
    res.redirect(`/login?redirect=${encodeURIComponent(req.originalUrl)}`); // Redirect back after the user logs in
  }

  /**
   * Save the Zealy User ID (optional)
  */
  // await updateUser(req.session.user.id, { zealyId: zealyUserId });


  /**
   * Redirect Back to Zealy
   */
  const userId = req.session.user.id; // Replace with your platform user ID

  const callbackWithParams = new URL(callbackUrl as string);
  callbackWithParams.searchParams.append("identifier", userId);

  const hmac = crypto.createHmac("sha256", YOUR_COMMUNITY_SECRET);
  hmac.update(callbackWithParams.toString());
  const callbackSignature = hmac.digest("hex");

  callbackWithParams.searchParams.append("signature", callbackSignature);

  res.redirect(callbackWithParams.toString());
});
1. 验证签名
您的应用程序首先应使用社区密钥验证签名。此验证确保调用确实来自我们且未被修改。
我们使用 SHA256 哈希算法生成签名。要验证签名,你可以使用以下方法:
const fullUrl = new URL(
  `${req.protocol}://${req.get("host")}${req.originalUrl}`
);
fullUrl.searchParams.delete("signature");

const hmac = crypto.createHmac("sha256", YOUR_COMMUNITY_SECRET);
hmac.update(fullUrl.toString());
const generatedSignature = hmac.digest("hex");

const isSignatureValid = generatedSignature === req.query.signature;
2. 使用 Zealy User ID
下一步取决于你想做什么,但客户通常会在你的平台上登录当前用户,并将你平台的用户 ID 与 Zealy User ID 关联。下面是一个示例:
  /**
   * Redirect to login if the user is not authenticated
   */
  if (!req.session.user) {
    res.redirect(`/login?redirect=${encodeURIComponent(req.originalUrl)}`); // Redirect back after the user logs in
  }

  /**
   * Save the Zealy User ID (optional)
  */
  // await updateUser(req.session.user.id, { zealyId: zealyUserId });
3. 重定向回 Zealy
最后一步是使用我们提供的 callback 查询参数,将用户连同你平台的用户 ID 重定向回 Zealy,以便我们允许用户领取任务。你还需要生成签名,以便我们验证该调用来自你且未被修改。请参见下面的示例:
const callbackWithParams = new URL(callbackUrl as string);
callbackWithParams.searchParams.append("identifier", connectedUserId); // Set it to your platform user ID

const hmac = crypto.createHmac("sha256", YOUR_COMMUNITY_SECRET);
hmac.update(callbackWithParams.toString());
const callbackSignature = hmac.digest("hex");

callbackWithParams.searchParams.append("signature", callbackSignature);

res.redirect(callbackWithParams.toString());
4. Zealy
我们收到回调后,会验证签名并存储你平台的用户 ID,以便将其作为 API 任务请求体的一部分发送。
用户现在可以领取该任务,以及任何使用相同重定向 URL 的 Zealy Connect 的其他任务。我们会记住这一点,因此用户无需为每个任务都进行连接。
如果你需要删除用户的 Zealy Connect 关联,可以使用 Delete Zealy Connect for Member API 路由。该路由允许你移除特定成员的 Zealy Connect 关联。调用该路由后,用户需要重新连接其账户才能再次使用 Zealy Connect 功能。