API
Automate actions on external platforms
Overview
This guide is about the API task. You can find our full API documentation here.
API quests are used to automate quests on external platforms. You might use it to confirm that the user has registered or made a purchase, has opened a PR for an issue on Github or to add support Reddit. The possibilities are endless. To get started and try out the functionality we offer a basic endpoint you might use to do partnerships with other Zealy communities. Learn more about how to set it up below.
Basics
Creating an "API" Task
- Click on 'Add task'.
- Select 'Api'.
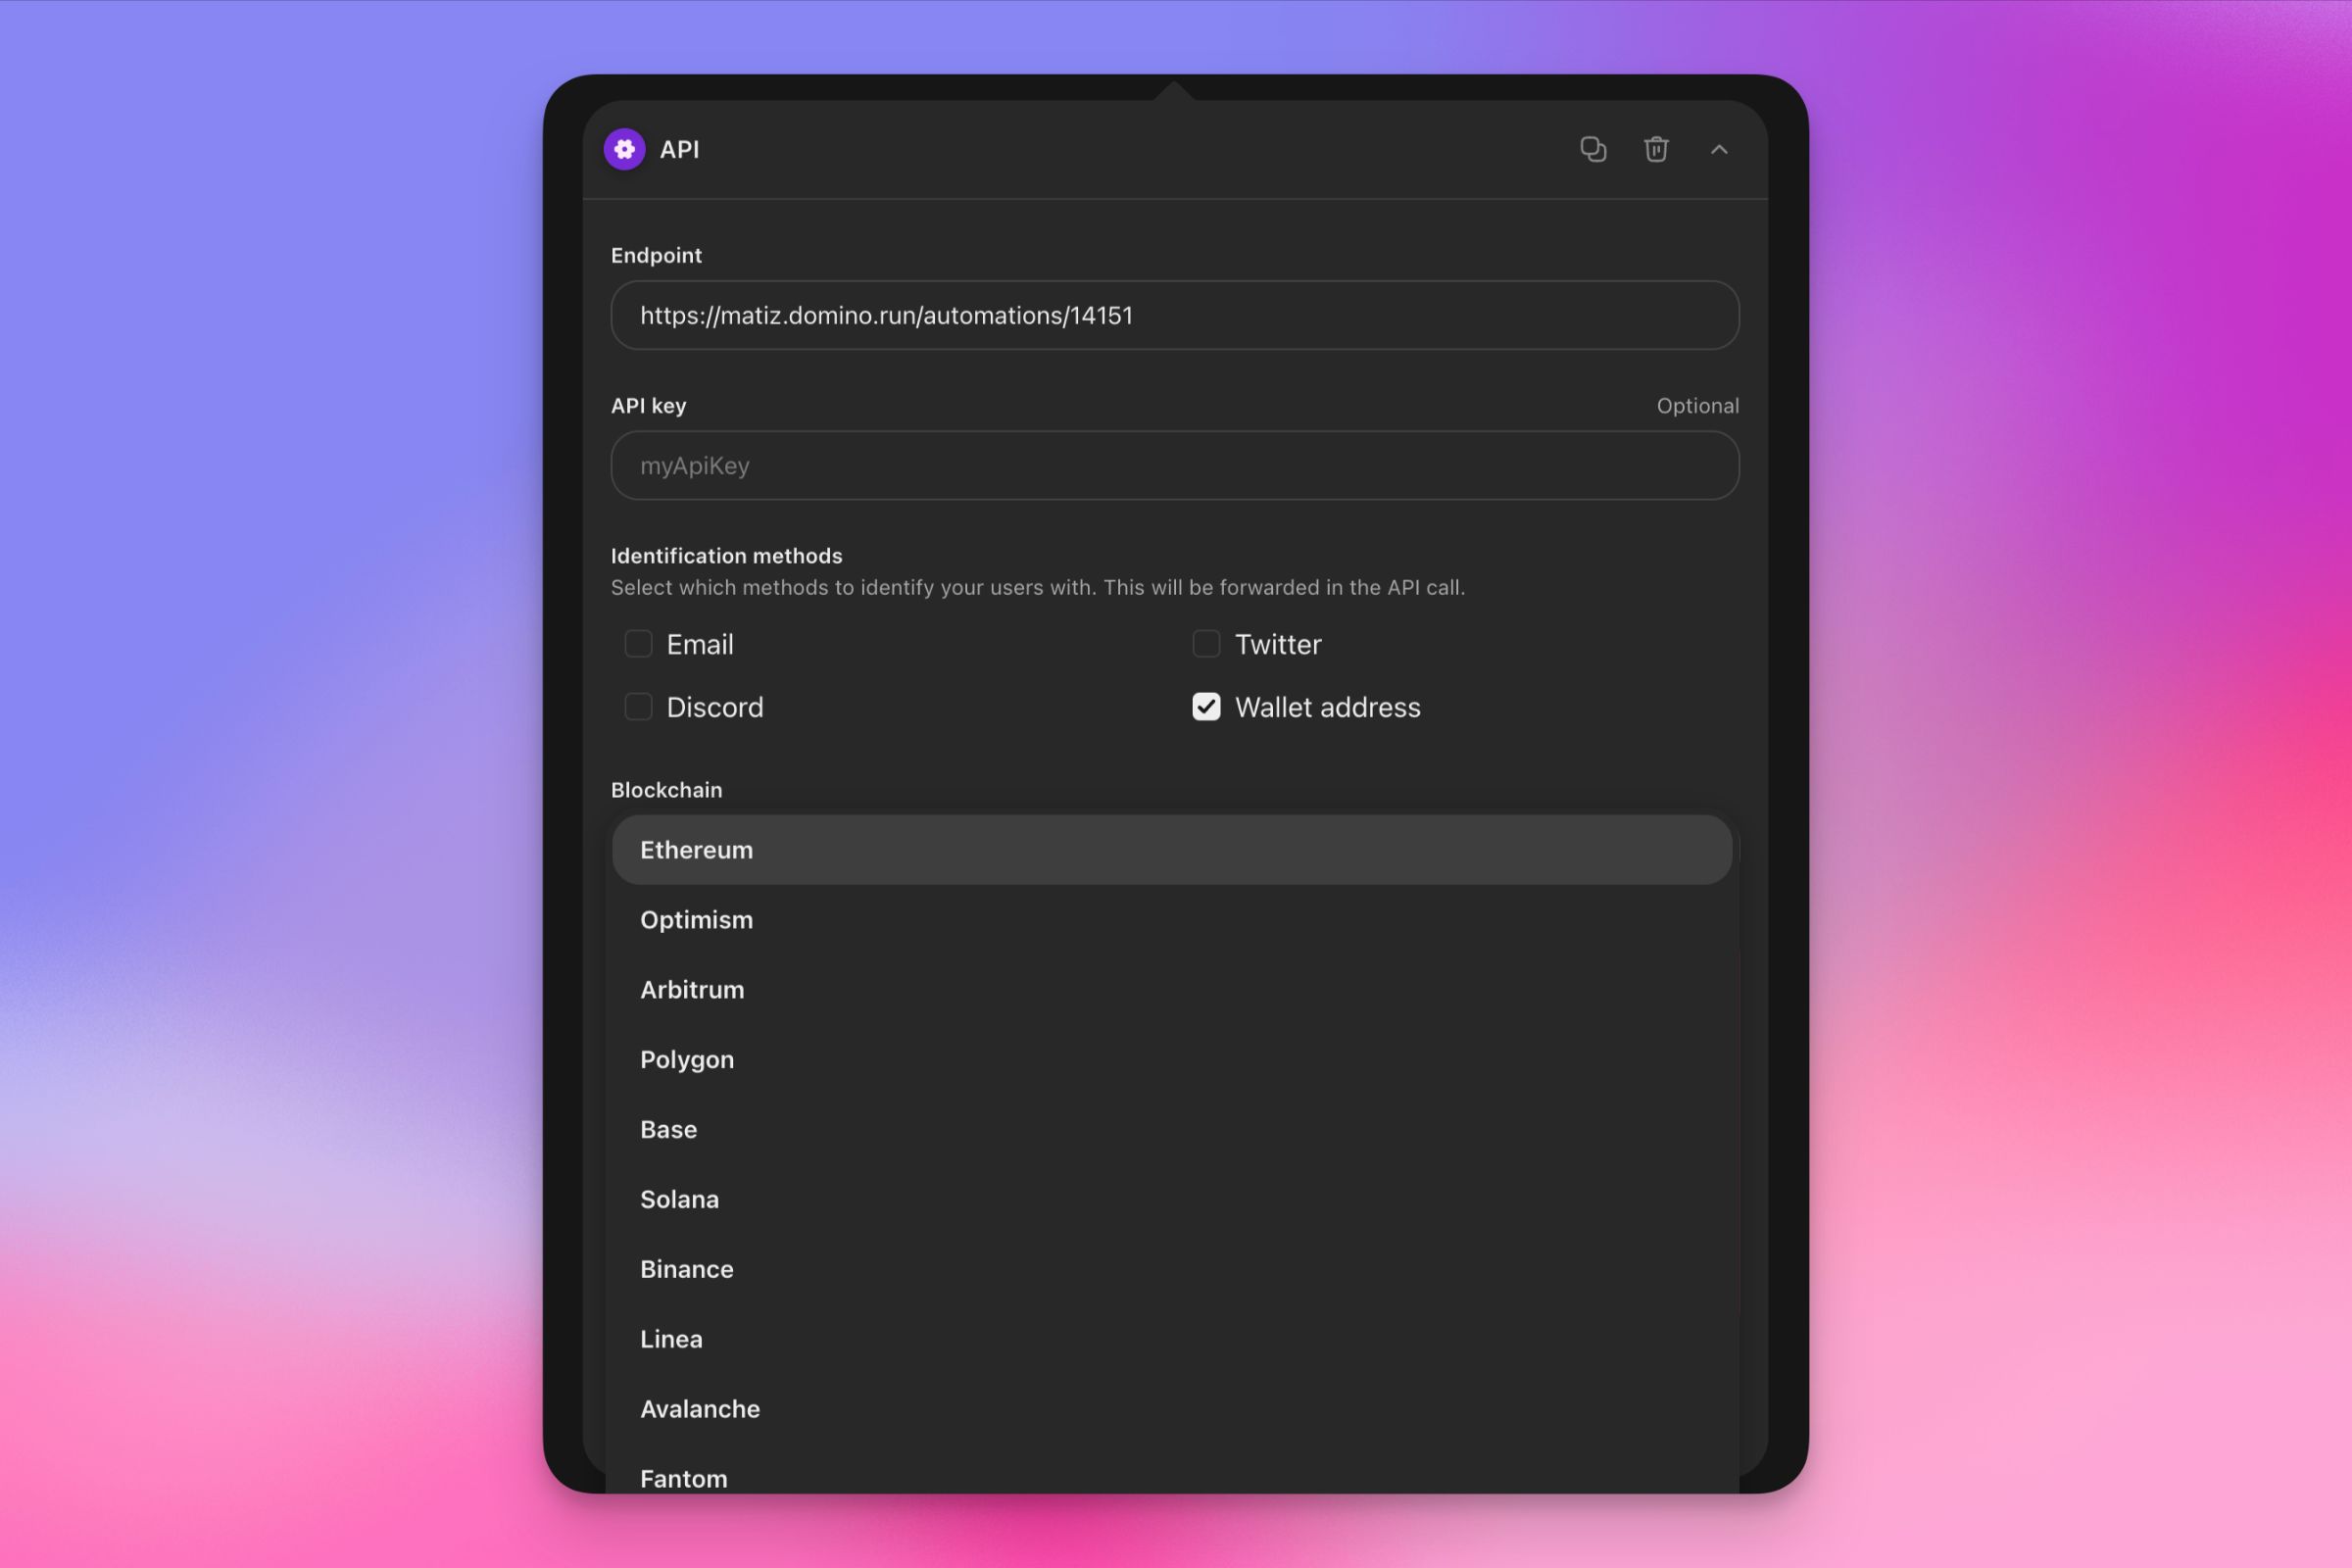
- Define the endpoint to call and an API key if needed.
- Choose how the users can identify. You can select from Email, Twitter, Discord, Wallet address, or Zealy Connect.
- If choosing wallet connection, you can also choose which network to use.
-
If choosing Zealy Connect, follow these steps:
- Define the redirect URL: This URL will be used for authentication. We will redirect users to this URL for them to authenticate in your system.
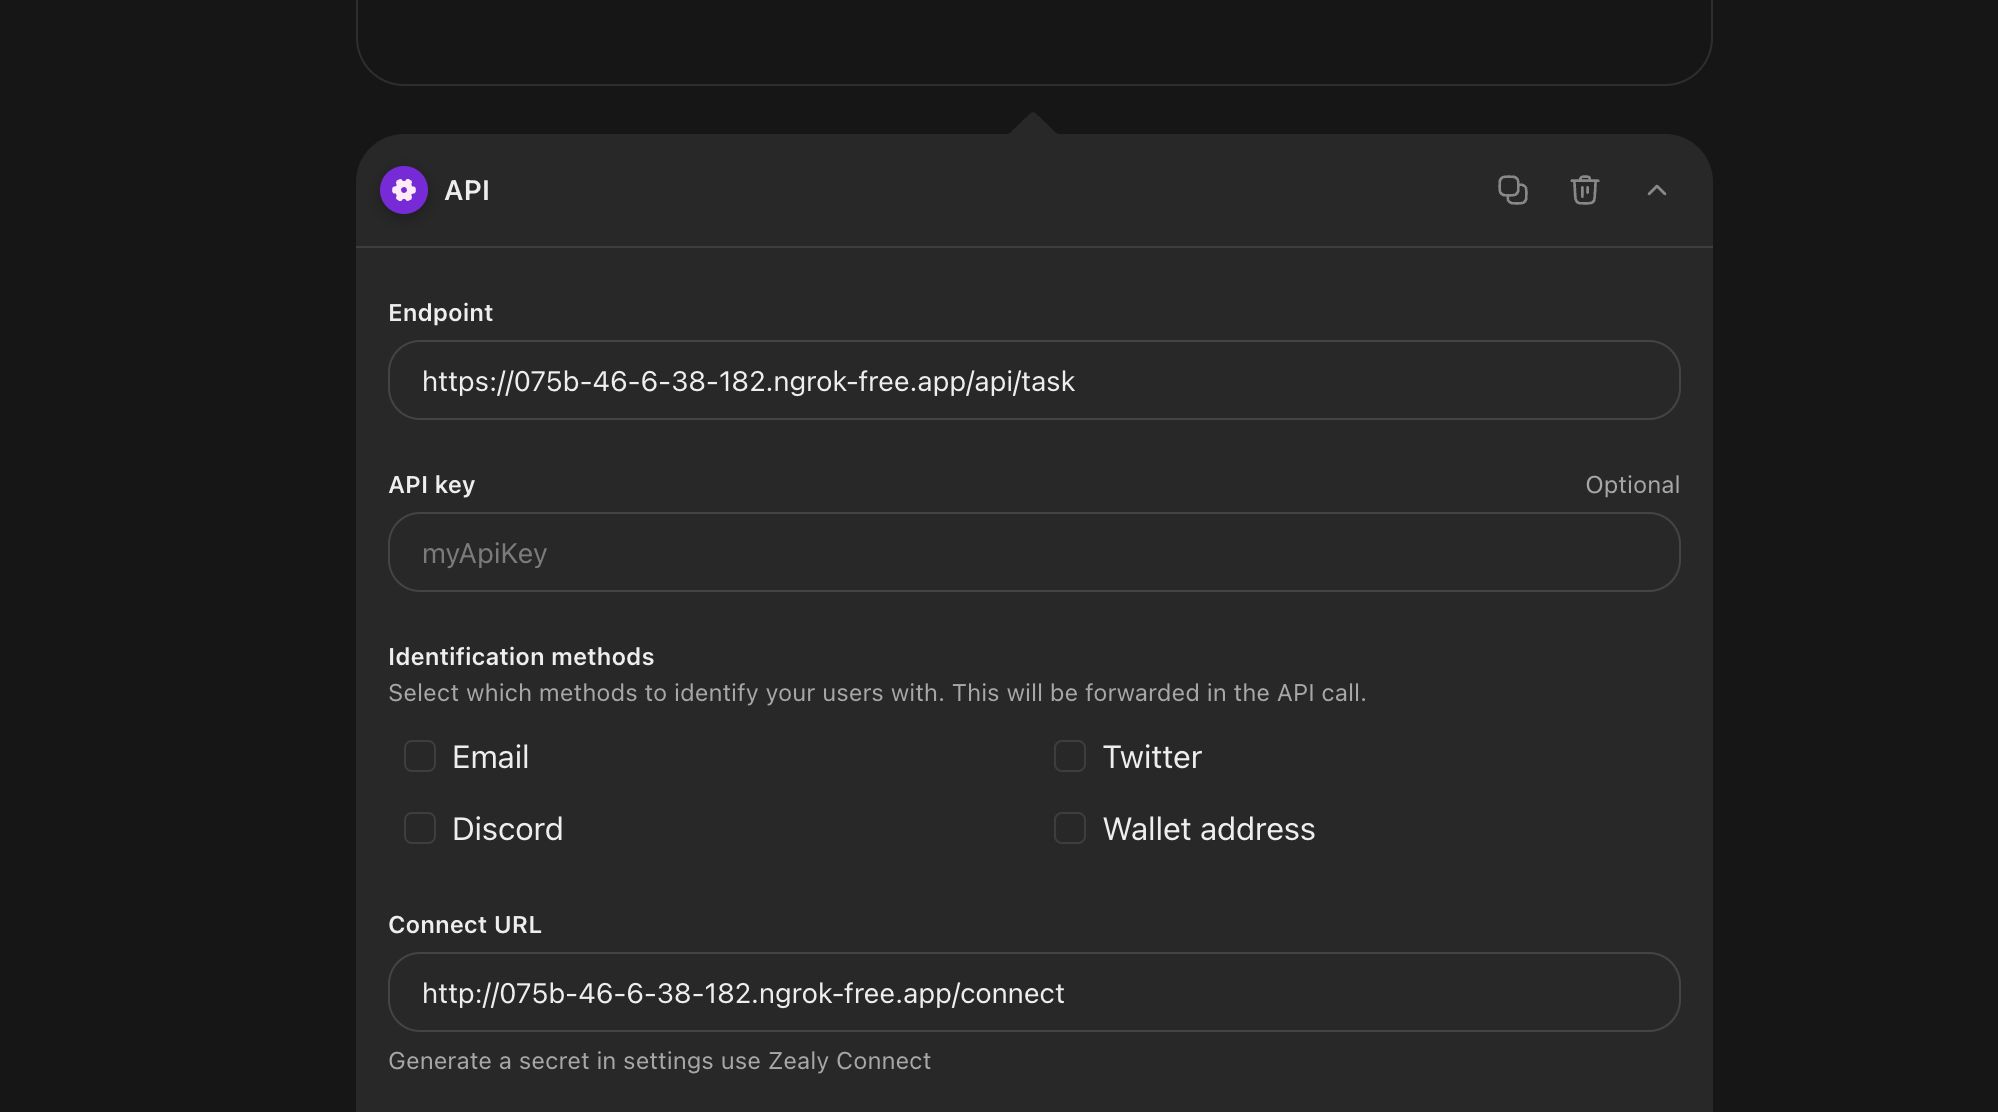
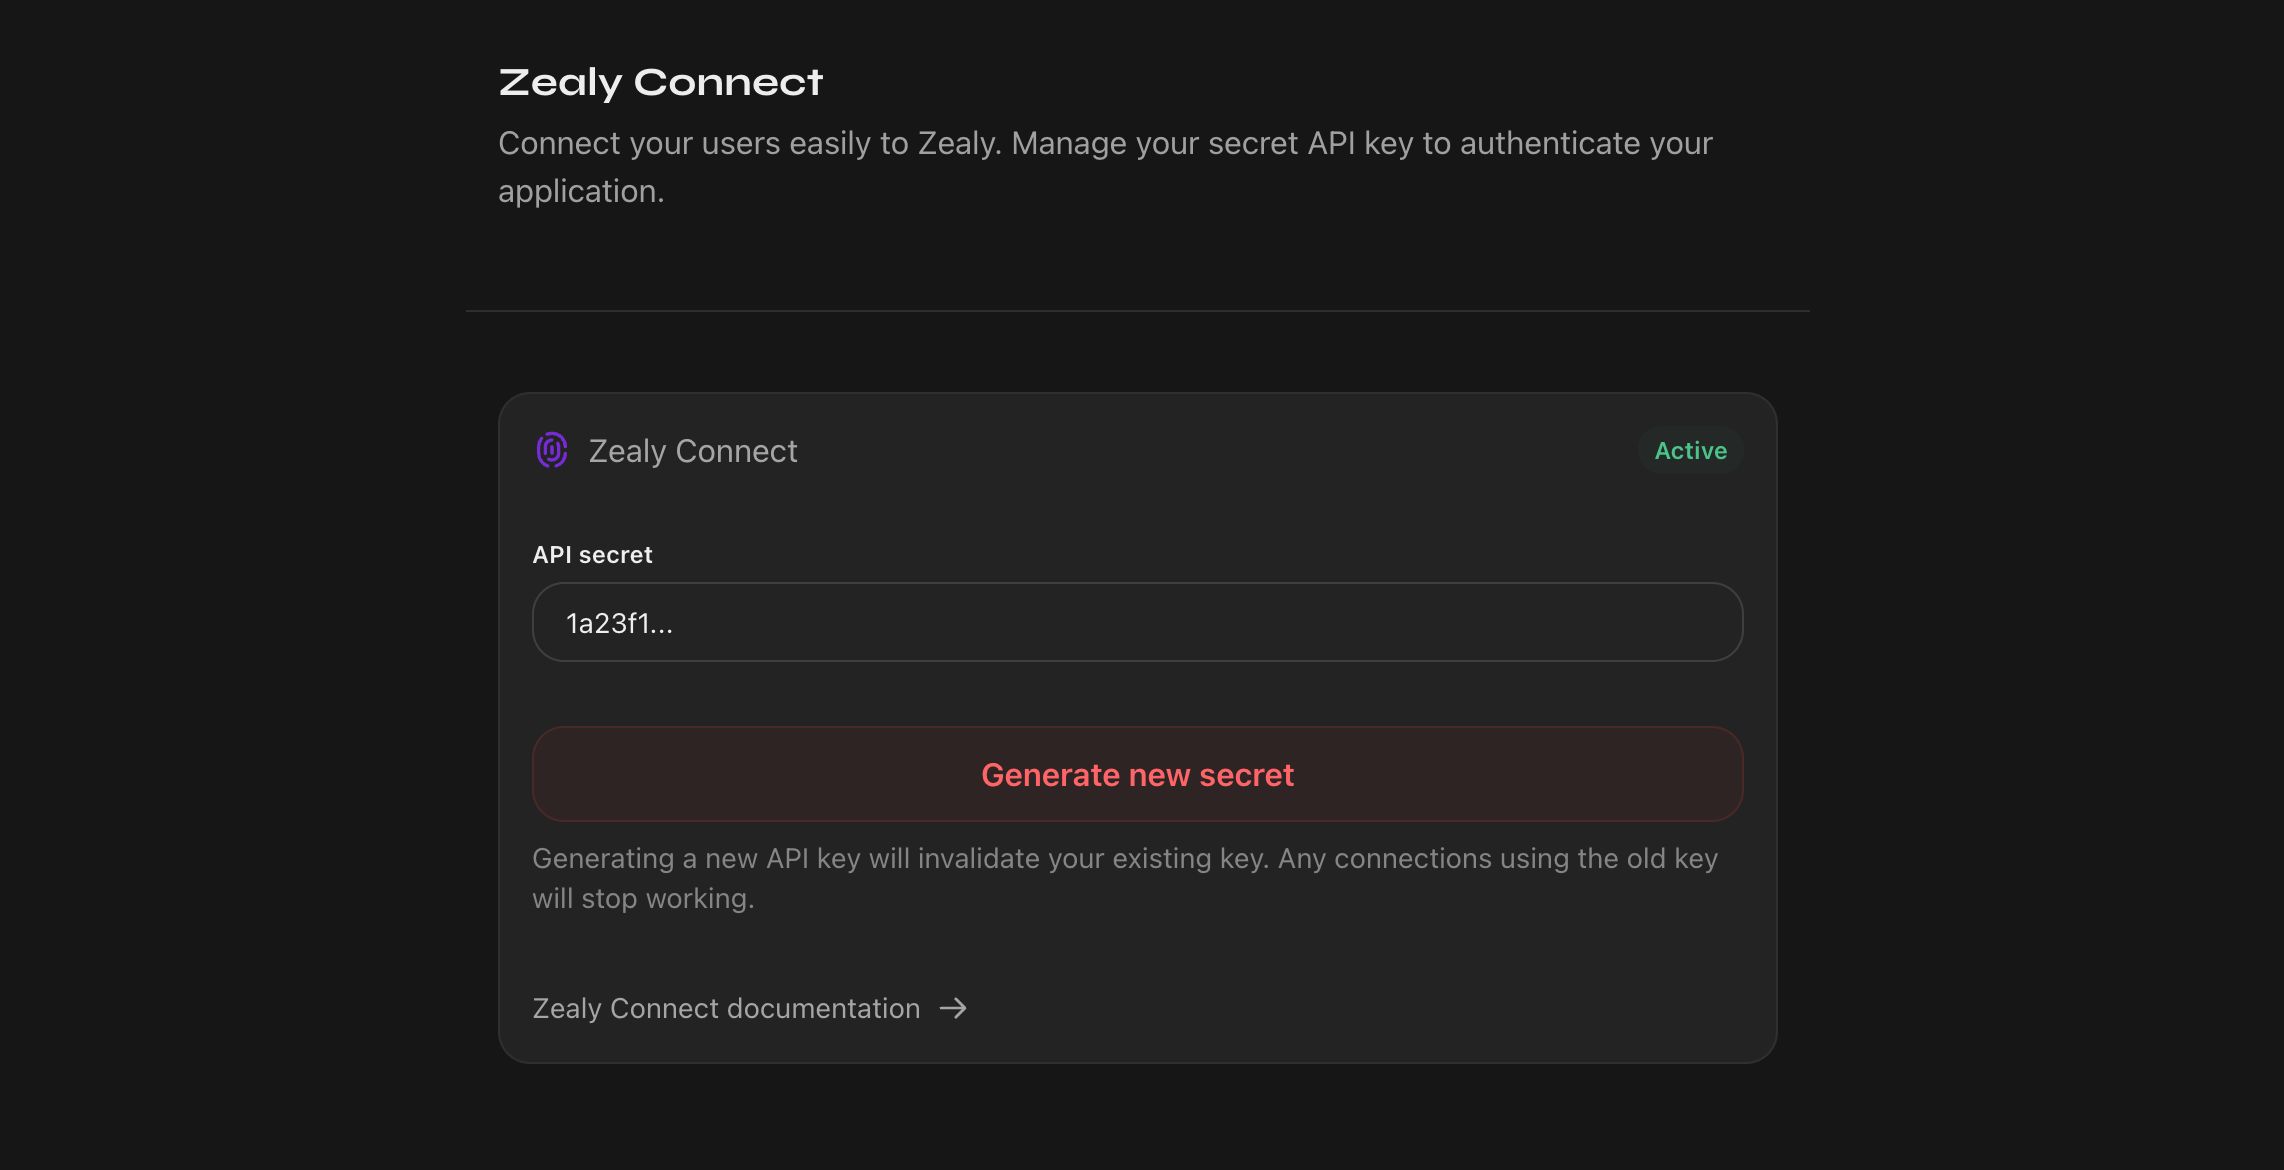
- Generate a community secret: Generating a community secret is required for Zealy Connect to work. You can create the secret from the Zealy Connect settings under the Integrations section in your community settings.
For in-depth information about how APIs are expected to work, please see the API documentation and for guidance on managing Zealy Connect, please refer to the Zealy Connect documentation.
Integration with Domino
Domino is the Web3 Zapier. It allows you to extend the capabilities of Zealy and automatically review tasks that are not natively supported, such as:
- Checking if a user's Twitter name or bio contains a specific word
- Checking a user's NFT & token balance
- Verifying that a user has invited a certain number of people on Discord
- And many more
Check out their documentation for integration.
Endpoint testing
When configuring the endpoint we will automatically run the following tests to make sure that the endpoint is working as expected:
- Checking so the call doesn't take longer than 10 seconds
- Verifying that the error message is in the correct format so that we might display it to the user
- Making sure that it's not any of the unexpected status codes. The endpoint should only return 200 or 400.
Creating a custom endpoint
Request
You can use the API tasks with a custom POST endpoint accepting the following body:
{
  /**
   * The user id on Zealy
   */
  userId: string;
  /**
   * Your community id on Zealy, if you use the endpoint
   * on multiple communities this might be useful
   */
  communityId: string;
  /**
   * Your community's subdomain on Zealy, if you use the endpoint
   * on multiple communities this might be useful
   */
  subdomain: string;
  /**
   * The id of the quest
   */
  questId: string;
  /**
   * This will be generated on every claim as a way to look up an error.
   * It will also be displayed for the user when a claim fails.
   */
  requestId: string;
  /**
   * Accounts will be sent if at least one identification method has been configured
   */
  accounts?: {
    /**
     * The user's email address
     */
    email?: string;
    /**
     * The user's Ethereum wallet address that he has authenticated with
     */
    wallet?: string;
    /**
     * The user's Discord id and handle
     */
    discord?: {
      id: string;
      handle: string;
    };
    /**
     * The user's Twitter id and username
     */
    twitter?: {
      id: string;
      username: string;
    };
    /**
     * Your platform user ID stored as part of the Zealy Connect integration
    */
    zealy-connect: string
  };
}
You can protect it with an API key that is set when creating the task. The API key will be send in the headers like this:
{
  "X-Api-Key": apiKey,
}
Response
If the action has been performed successfully by the user you should return a 200 status. The user will then successfully claim the task.
{
  "message": "User completed the action"
}
Otherwise, the 400 status should be returned in the response along with a message in the body. The message will be displayed with the generated requestId to help you and the user debug any issues. Make sure that it is as descriptive as possible.
{
  "message": "We could not find a user with email kenny@zealy.io"
}
Code example
// server.js
//
// Use this sample code to handle quest verification in your endpoint.
//
// 1) Paste this code into a new file (server.js)
//
// 2) Install dependencies
//   npm install express
//
// 3) Run the server on http://localhost:3000
//   node server.js

const express = require('express');
const app = express();

const apiKey = '5888a6800dbac634e52d8504f097e064'; // Replace with your API key configured in Zealy task

app.post('/claim', express.raw({ type: 'application/json' }), (req, res) => {
  const payload = req.body;
  const headers = req.headers

  if (apiKey !== headers['x-api-key']) {
    throw new Error('Invalid API Key')
  }


  const success = true; // Replace with custom logic

  if (!success) {
    return res.status(400).send({
      message: 'Validation failed' // Replace with custom error message - will be displayed to the user
    })
  }

  return res.status(200).send({
    message: "Quest completed"
  })
});

app.listen(3000, () => console.log('Running on port 3000'));
Local testing with ngrok
When developing and testing your custom endpoint locally, you need a way to expose your local server to the internet so Zealy can send API requests to it. ngrok is a tool that creates secure tunnels to localhost and is perfect for this purpose. Follow these steps to set up ngrok and test your endpoint:
Step 1: Install ngrok Download ngrok from ngrok's website. Follow the installation instructions for your operating system.
Step 2: Set up ngrok Sign up for a free ngrok account and get your authtoken from the ngrok dashboard. Connect your ngrok account by running ngrok authtoken YOUR_AUTH_TOKEN in your terminal, replacing YOUR_AUTH_TOKEN with the token from your ngrok dashboard.
Step 3: Start your local server Ensure your local server that hosts the endpoint is running. For instance, if your server is a Node.js app, you might run node server.js.
Step 4: Expose your local server with ngrok
Open a new terminal window and start an ngrok tunnel to your local server's port (e.g., 3000) using ngrok http http://127.0.0.1:3000.
ngrok will display a forwarding URL in the terminal (e.g., https://abc123.ngrok.io). This is the public URL that Zealy will use to reach your local server.
Step 5: Configure your API task in Zealy Use the ngrok forwarding URL as the endpoint URL when setting up your API task in Zealy. Ensure to append any required path, for example, https://abc123.ngrok.io/claim.
Note: Remember, ngrok URLs are temporary and change every time you restart ngrok, unless you have a paid subscription that supports custom subdomains. Make sure to update the endpoint in Zealy every time you restart ngrok.
By following these steps, you can easily test and debug your custom endpoint in a local development environment before deploying it to a production server.
Zealy Connect Integration
When using Zealy Connect, we will redirect the user to the URL specified during the task setup. We will include the following query params:
zealyUserId: A unique identifier for the user in the Zealy system used to link them with your platform.callback: The URL to redirect the user back after the authentication is completed so they can claim the task.signature: A SHA-256 hash used to verify the authenticity of the request, ensuring it originated from Zealy.
Here is a full example endpoint that you can use as a starting point:
const YOUR_COMMUNITY_SECRET = "fdb68b155a1ccf2e636c7cd7e0816530"; // Replace with your secret generated in Settings > Integrations > Zealy Connect

app.get("/connect", (req, res) => {
  // Extract the query parameters
  const { zealyUserId, signature, callbackUrl } = req.query;

  /**
   * Verifying signature to ensure the request is coming from Zealy
   */
  const fullUrl = new URL(
    `${req.protocol}://${req.get("host")}${req.originalUrl}`
  );
  fullUrl.searchParams.delete("signature");

  const hmac = crypto.createHmac("sha256", YOUR_COMMUNITY_SECRET);
  hmac.update(fullUrl.toString());
  const generatedSignature = hmac.digest("hex");

  if (generatedSignature !== signature){
    return res.status(400).send("Invalid signature");
  }

  /**
   * Redirect to login if the user is not authenticated
   */
  if (!req.session.user) {
    res.redirect(`/login?redirect=${encodeURIComponent(req.originalUrl)}`); // Redirect back after the user logs in
  }

  /**
   * Save the Zealy User ID (optional)
  */
  // await updateUser(req.session.user.id, { zealyId: zealyUserId });


  /**
   * Redirect Back to Zealy
   */
  const userId = req.session.user.id; // Replace with your platform user ID

  const callbackWithParams = new URL(callbackUrl as string);
  callbackWithParams.searchParams.append("identifier", userId);

  const hmac = crypto.createHmac("sha256", YOUR_COMMUNITY_SECRET);
  hmac.update(callbackWithParams.toString());
  const callbackSignature = hmac.digest("hex");

  callbackWithParams.searchParams.append("signature", callbackSignature);

  res.redirect(callbackWithParams.toString());
});
1. Verify the Signature
The first thing your application should do is validate the signature using your community secret. This validation ensures that the call is genuinely coming from us and has not been modified.
We use the SHA256 hash algorithm to generate the signature. To verify it, you can use the following approach:
const fullUrl = new URL(
  `${req.protocol}://${req.get("host")}${req.originalUrl}`
);
fullUrl.searchParams.delete("signature");

const hmac = crypto.createHmac("sha256", YOUR_COMMUNITY_SECRET);
hmac.update(fullUrl.toString());
const generatedSignature = hmac.digest("hex");

const isSignatureValid = generatedSignature === req.query.signature;
2. Use the Zealy User ID
The next step depends on what you want to do, but customers usually log in the current user on your platform and link your platform's user ID with the Zealy User ID. Below is an example:
  /**
   * Redirect to login if the user is not authenticated
   */
  if (!req.session.user) {
    res.redirect(`/login?redirect=${encodeURIComponent(req.originalUrl)}`); // Redirect back after the user logs in
  }

  /**
   * Save the Zealy User ID (optional)
  */
  // await updateUser(req.session.user.id, { zealyId: zealyUserId });
3. Redirect Back to Zealy
The last step is to redirect the user back to Zealy with your platform's user ID so we can allow the user to claim the task, using the callback query parameter that we provide. You also need to generate a signature so we can verify that the call is coming from you and has not been modified. See the example below:
const callbackWithParams = new URL(callbackUrl as string);
callbackWithParams.searchParams.append("identifier", connectedUserId); // Set it to your platform user ID

const hmac = crypto.createHmac("sha256", YOUR_COMMUNITY_SECRET);
hmac.update(callbackWithParams.toString());
const callbackSignature = hmac.digest("hex");

callbackWithParams.searchParams.append("signature", callbackSignature);

res.redirect(callbackWithParams.toString());
4. Zealy
Once we receive the callback, we will validate the signature and store your platform’s user ID so we can send it as part of the API task body.
The user will now be able to claim the task and any other task that uses Zealy Connect with the same redirect URL. We will remember this so the user does not have to connect for every task.
If you need to delete a user's Zealy Connect association, you can use the Delete Zealy Connect for Member API route. This route allows you to remove the Zealy Connect association for a specific member. After calling this route, the user will need to reconnect their account to use Zealy Connect features again.